Page Tree
Previous Releases
Communication Driver Name: MQTTAzure
Implementation DLL: T.ProtocolDriver.MQTTAzure.dll
Interface: TCPIP
Protocol: MQTT (Message Queuing Telemetry Transport) is a machine-to-machine (M2M)/"Internet of Things" connectivity protocol
PC Hardware requirements: Ethernet board
Implemented Methods: Connect, Disconnect, Subscribe, Unsubscribe, and Publish
Not used in this driver
Station syntax: <URL>;<Port>;<ClientID>;<Username>;<Password>;<SslProtocol>;[X509Certificate];<PayloadFormat>
Where:
URL= CustomHub-MQTT.azure-devices.net
Port= 8883
Client ID= MQTT_Device
Username= CustomHub-MQTT.azure-devices.net/ MQTT_Device
Password= SharedAccessSignature sr=CustomHub-MQTT.azure devices.net&sig=ygIt%2FG8fIFAXhUwGXBlm6WKDK5IhbmVHkUs4atsbXFU%3D&skn=iothubowner&se=1612 031715
Ssl Protocol= <TLS>
X059 Certificate=
Payload Format= JSON/SparkplugB
For more information on how to set up a connection with Azure IoT Hub and find the required parameters, see Append.
The MQTT and Azure protocol supports Write Commands only.
The Address syntax is: [Payload]:<Group >;<Node>;<Device>;
Where:
E.g.: Payload:GroupID;NodeID;DeviceID;
Payload:AzureGroup;Factory1;Motor
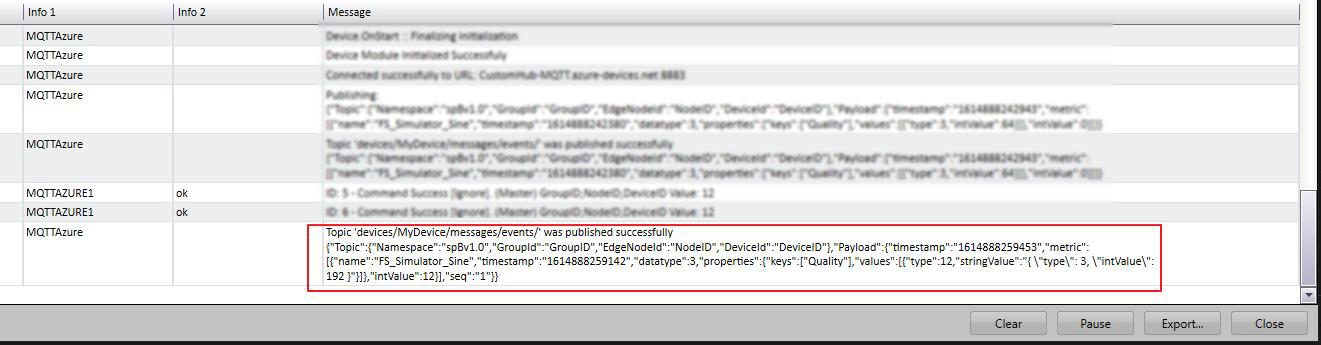
The status of the driver execution can be observed through the diagnostic tools, which are:
• Trace window
• Property Watch
• Module Information
The above tools indicate if the operations have succeeded or have failed. A status of 0 (zero) means communication is successful. Negative values indicate internal driver errors, and positive values are protocol error codes.
This section details some errors you might see in your connection to the Azure IoT Hub via the MQTT protocol and discusses the possible causes of the errors.
Error: Exception connecting to the broker
If you see this message on the Trace Window Logs (with the Debug and Devices modules enabled), check the port number parameter in Devices > Nodes > PrimaryStation.
Device.Node.Status = -1
If you get this error code in Devices.Node.<NodeName>.Status, check if the URL defined in Devices > Nodes > PrimaryStation is correct.
Error Connecting to Broker. Status: 5
If you see this message on the Trace Window Logs (with the Debug and Devices modules enabled), check the following parameters in Devices > Nodes > PrimaryStation.
MQTT driver connection lost: System.EventArgs
If you see this message on the Trace Window Logs (with the Debug and Devices modules enabled), check the QoS setting in Devices > Nodes > PrimaryStation. As stated in a previous section, the IoT Hub will automatically disconnect your client if the QoS value is 2 (Exactly Once).
Another reason your client might be disconnected is that someone else tried to connect to your IoT Device using the same ClientID. IoT Hub only supports one active MQTT connection per device. Any new MQTT connection with the same device ID causes IoT Hub to drop the existing connection.
The requirements for a successful configuration are:
Visual Studio Code is an open-source, streamlined code editor with support for development operations like debugging, task running, and version control. It can be downloaded here.
To download the extension that allows interaction with Azure IoT Hub and IoT Device Management, click here.
Note Item
This guide assumes that an IoT Hub already exists within the Azure Portal account.
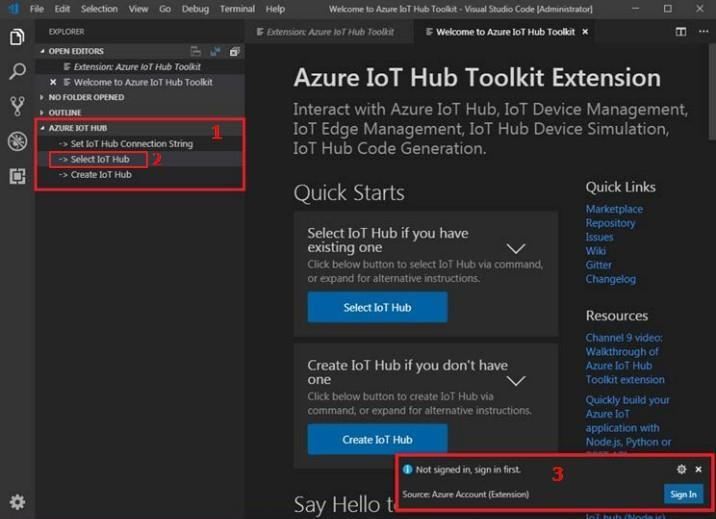
After installing the extension, open the VSCode application. In the VSCode's explorer, click on the ”Azure IoTHub” tab in the bottom left corner (1), and click ”Select IoT Hub” (2) in the context menu.
If you have not signed in to Azure, a pop-up will show in the bottom right corner to let you sign into Azure (3).
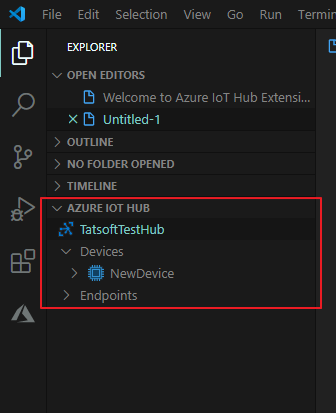
After you sign in, your Azure Subscription list will be shown. Select Azure Subscription and IoT Hub. The devices and endpoints list will be shown in the ”Azure IoT Hub” tab in a few seconds.
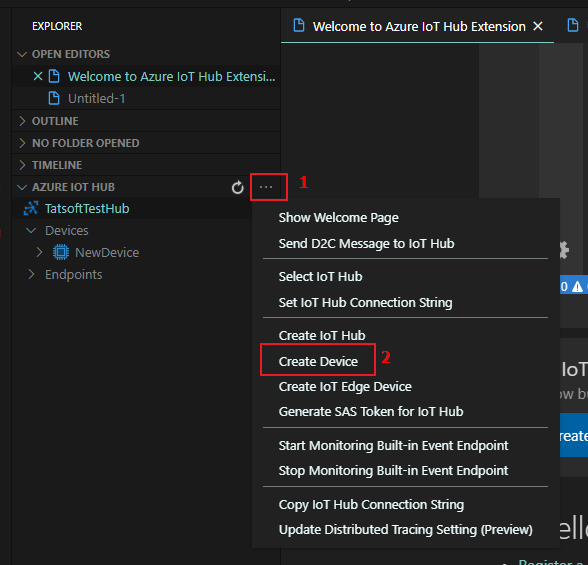
New IoT devices can be created through this extension. From the context menu (1), click Create Device (2). Enter a Device ID for the new IoT device.
Now that we have our Devices created, we will need to get our Connection String and SAS Token.
Right-Click on the Device. Select ”Get Device Info”. You should see some information displayed in the Output Window.
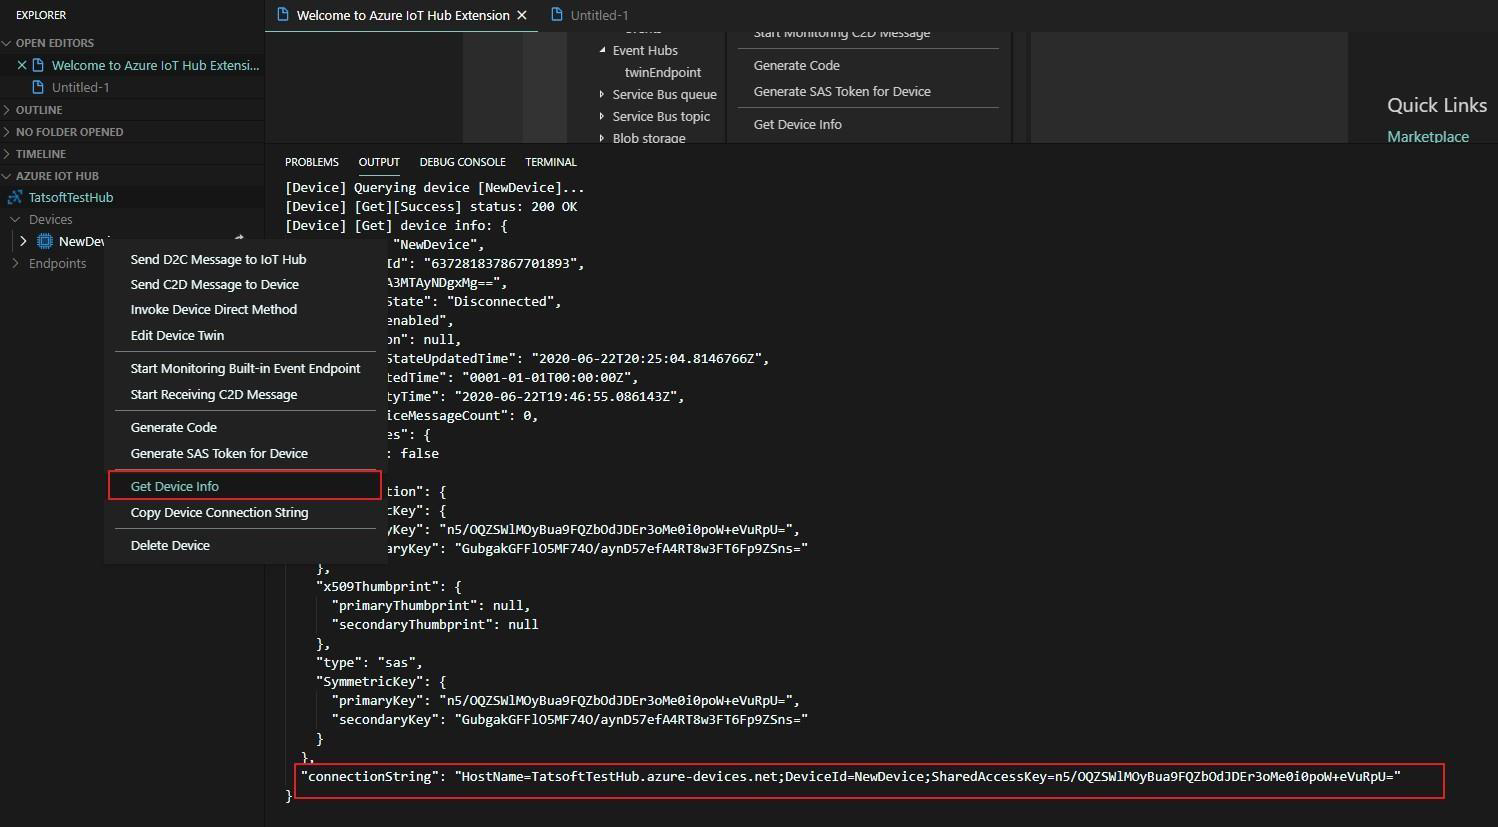
Review the Connection String created for the device, and record the following pieces of information from this string:
Again, right-click the device, and select ”Generate SAS token for device”. Enter the expiration time. You should see some information displayed in the Output Window.
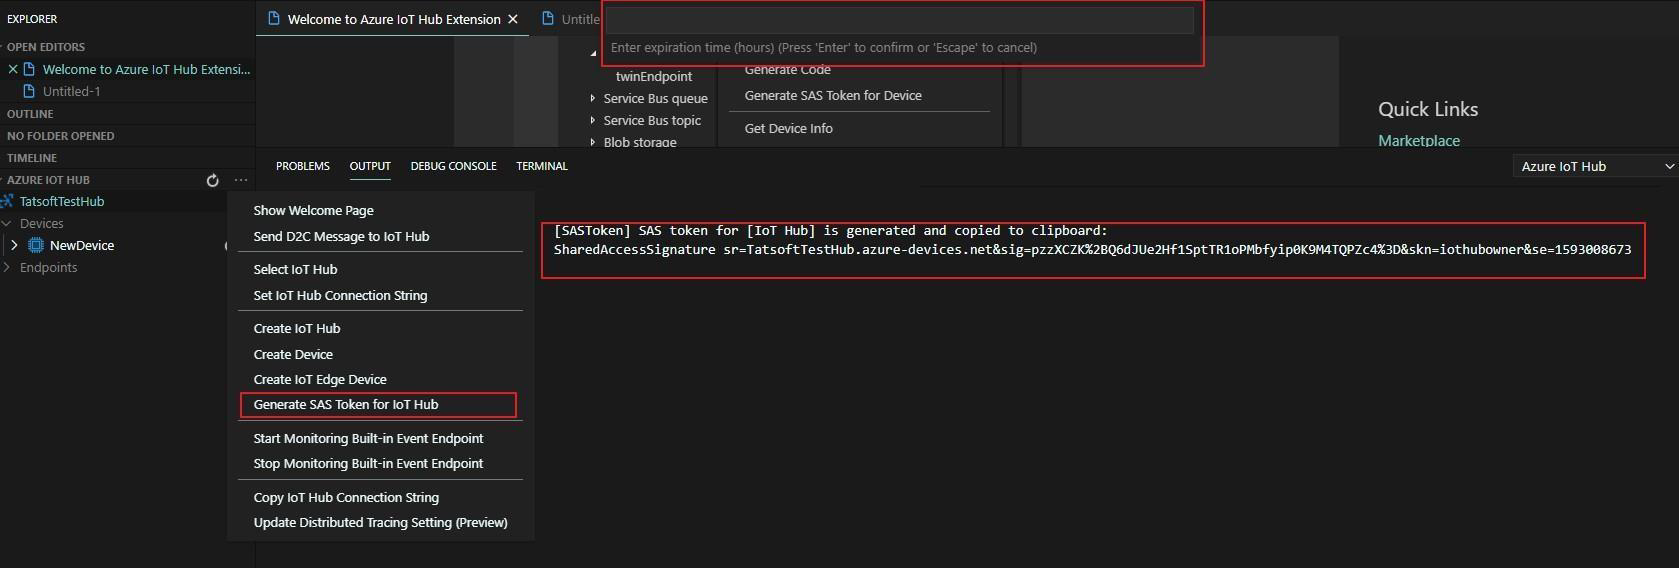
Record the following piece of information from this string:
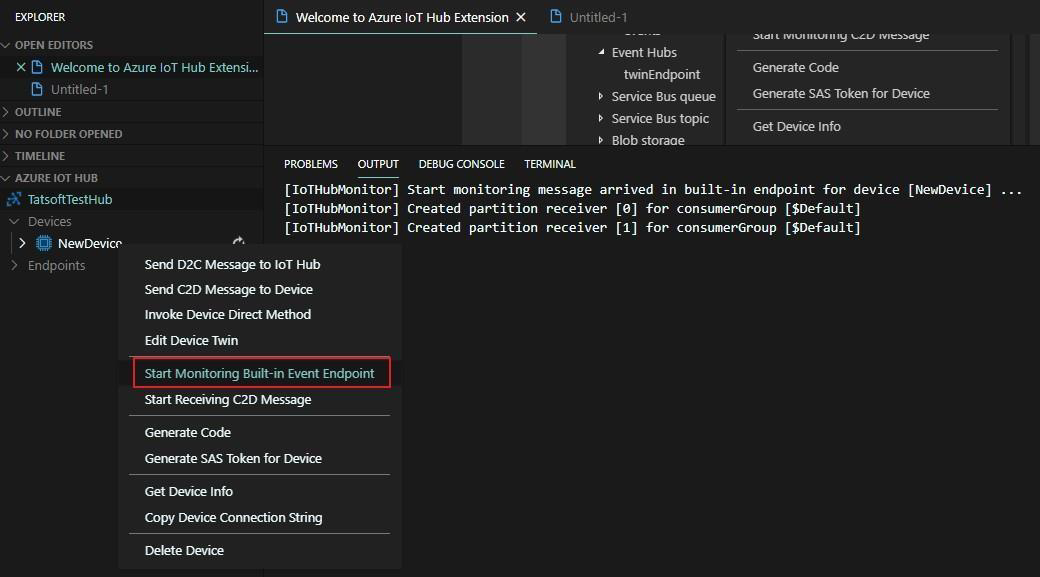
To verify that data is flowing from the MQTT Driver to the cloud-based Azure IoT Hub, right-click the device entry, and select ”Start Monitoring Built-In Event Endpoint”.
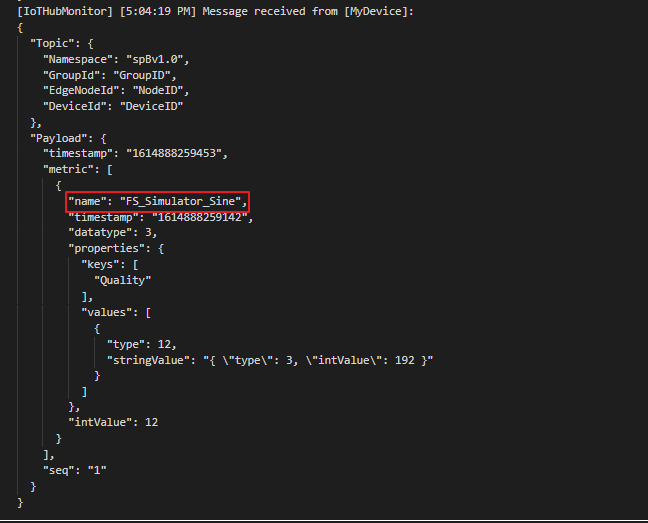
For the correct topic, see the Address section.