Page Tree
Previous Releases
A query is a request for data or information from a database table or combination of tables. This data may be generated as results returned by Structured Query Language (SQL) or as pictorials, graphs or complex results, e.g., trend analyses from data-mining tools.
One of several different query languages may be used to perform a range of simple to complex database queries. SQL, the most well-known and widely-used query language, is familiar to most database administrators
There are a couple different ways to execute a query in a project. Below you will find them listed with a short description.
Method 1: WhereCondition
The first method is to use the WhereCondition. In this case the data query will be performed on a Table, created at Edit > Datasets > Tables. Since the table is already selected, only the conditional is required. You also need to run SelectCommand to update the query.

Creation of a Table
Method 2: Query
The second method is similar to the first one, but it uses a Query, created at Edit>Datasets>Queries and linked to a Provider (see image below).
To execute the query you will have to select one of the Tables from the database, and what condition will be used to filter data. You need to run SelectCommand to update the query.
@Dataset . Query . Query1 . Sql Statement = ” s e l e c t ? from Table1 where
UTCTimestamp  Ticks>=”  +  StartTime . Utc Ticks  +  ”   and   UTCTimestamp  Ticks<=”  +
EndTime . Utc Ticks + ”” ;
@Tag . TableTag = @Dataset . Query . Query1 . SelectCommand () ;
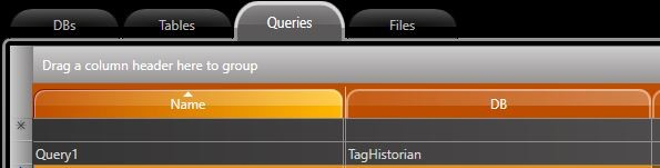
Creation of a Query
Method 3: Different Location
This alternative uses the same statement as presented before, but in a different Instead of writing it in a Task/Class or CodeBehind, it can be placed directly into Edit > Datasets > Queries > SqlStatement Column.

SqlStatement field
Method 4: SQL Query Builder
The last option is to use a feature called SQL Query Builder, that can be found at Edit>Datasets (see image below). It is a graphic interface that facilitates the creation of SQL Statements based on a specific Provider.
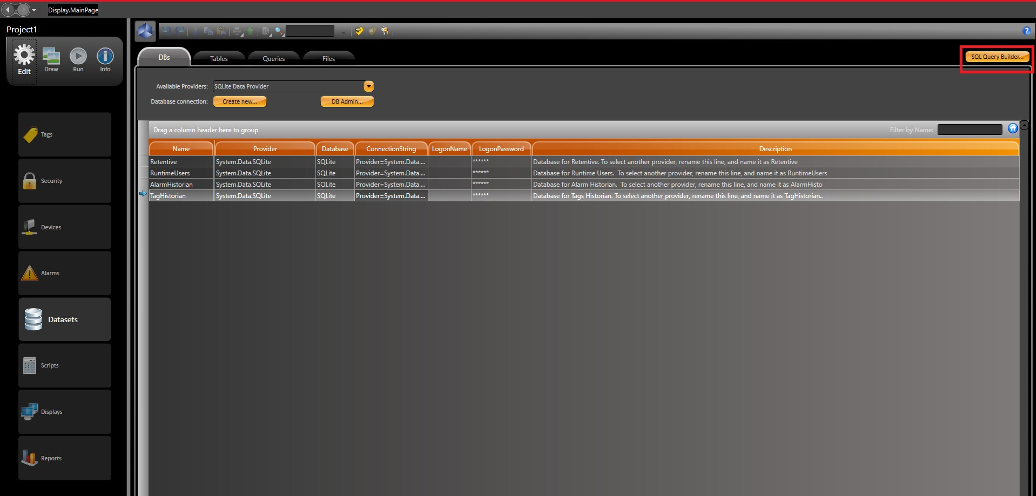
Where to find SQL Query Builder
This method is not as usual as the others, so more details regarding it functionalities will be detailed below.
Once you got your databases and providers configured correctly in the project, the first thing that needs to be done is to load the Data into the Query Builder.
To do so, open the Builder and click on the Connect button on the top-left corner.
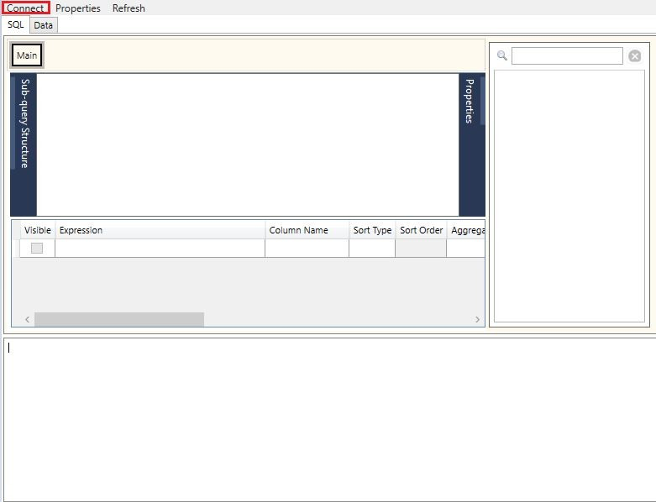
Starting loading process
A popup will appear, with a ComboBox containing various types of Providers. Select the one you will work with. In this example we will set up a connection to a SQLite DB.
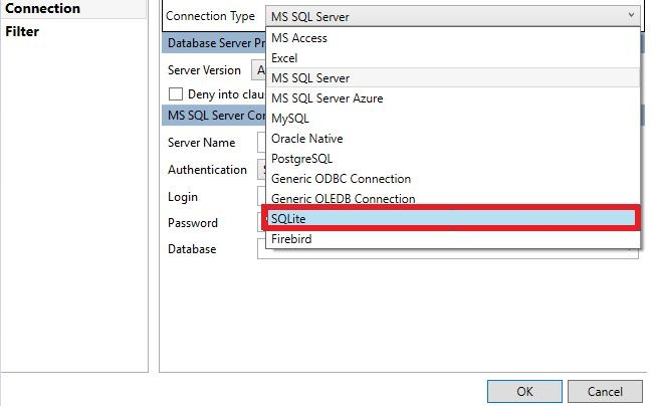
Connection Type options
Now, we need to configure the path to the Database. It is the same one as in the Connection- String’s DataSource field.
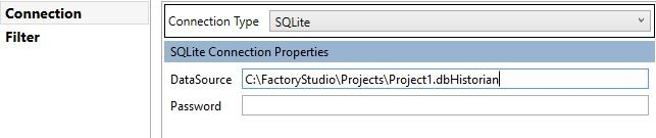
DataSource Path
If you wrote the right path, you should be able to see all available Tables and its elements on the right corner. Double-click on one of the Tables to load its elements into the Sub-Query Structure.
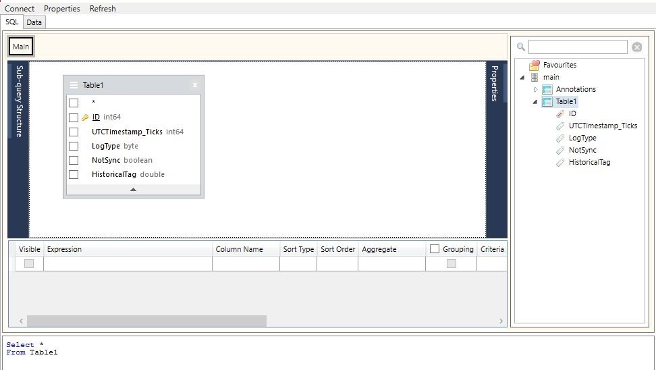
Loaded Tables
At the top-left corner, there is a Properties Button. When you select it, a popup will open with some customizable properties for the Query Builder.
In the image below all available properties are presented.
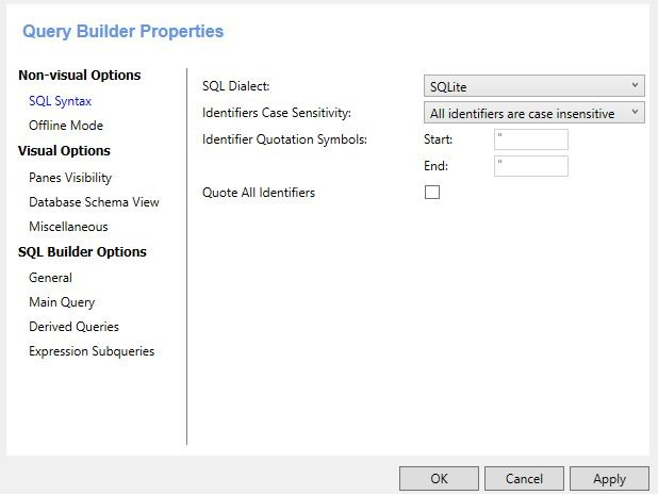
Query Builder Properties
After one of the loaded tables is selected into the Sub-query Structure, you can see that a statement is initialized at the bottom of the page.
To filter individual columns from the table, it is required only to check the element CheckBox. If none is selected, then your querie will return all table elements.
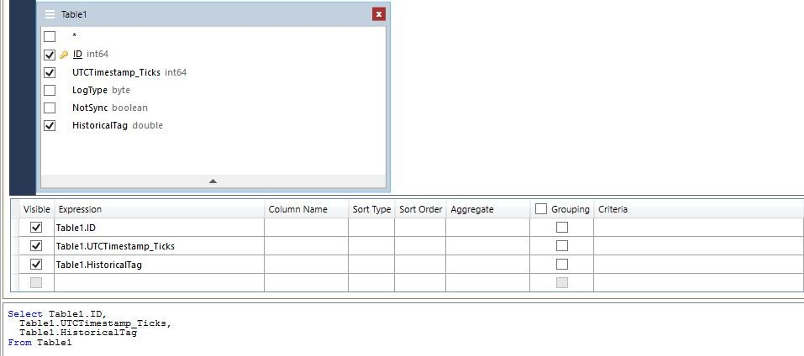
Check columns
There are some columns in which it is possible to add conditions to filter values from the table. The column options are:
To better illustrate the Query Builder feature, let’s create an example. Assuming the following requirements for our query result:
Filling the columns with the required information to perform the query as in the image.

Configuration for Query
The final SQL Statement generated by the Query Builder was:
Select Table1 . Historical Tag As TagValue , Table1 . UTCTimestamp Ticks As Date
From Table1
Where Table1 . Historical Tag = Table1 . Historical Tag > 10 And Table1 . Historical Tag <= 35
Order By TagValue , Date