Page Tree
Previous Releases
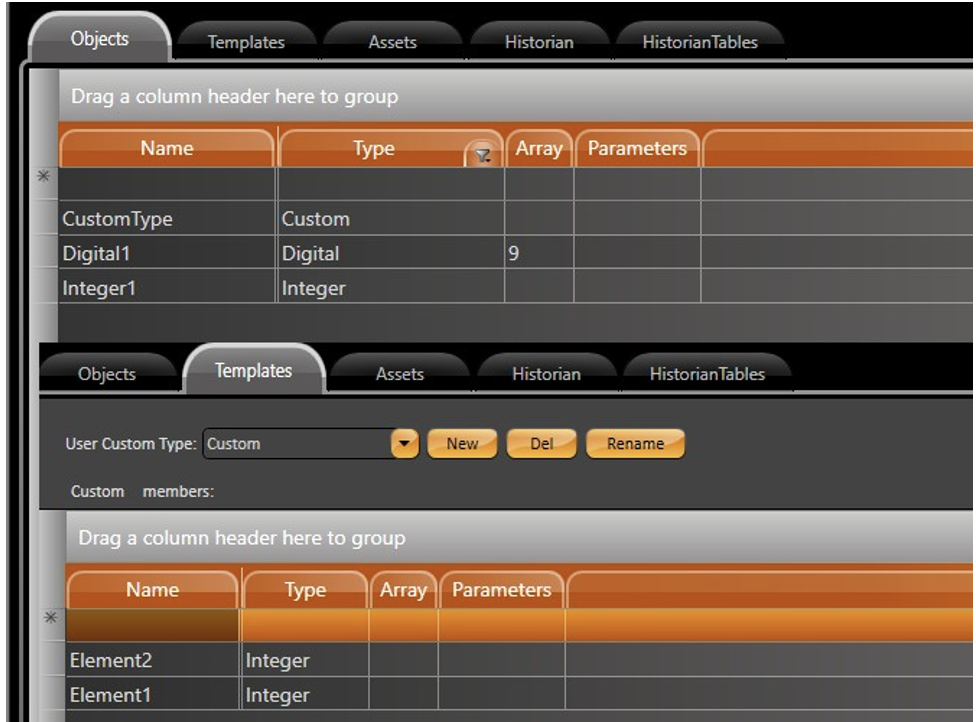
The first step to use this feature is to create a Tag in your Project. This tag can be a simple one, an array or Custom Type.
To better understand the feature, three examples are shown below. The tags created are as follows:
1.	Tag.Integer1 -- Integer DataType -- Simple Tag.
2.	Tag.Digital1 -- Digital DataType -- Array of 10 elements.
3.	Tag.CustomType -- Custom DataType
-- Sub-Elements: Element1 (Integer), Element2 (Integer.)
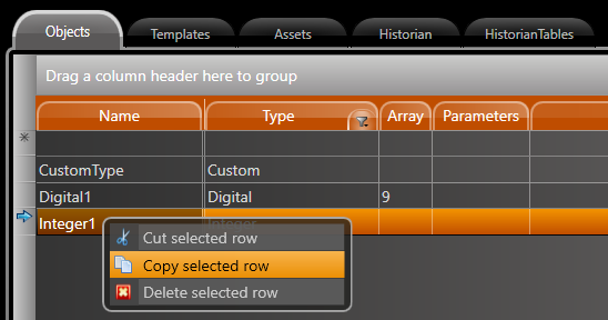
Now that our tags were created, we can start adding them to the display. Right-click at Integer1 Tag, and select Copy Selected Row option.
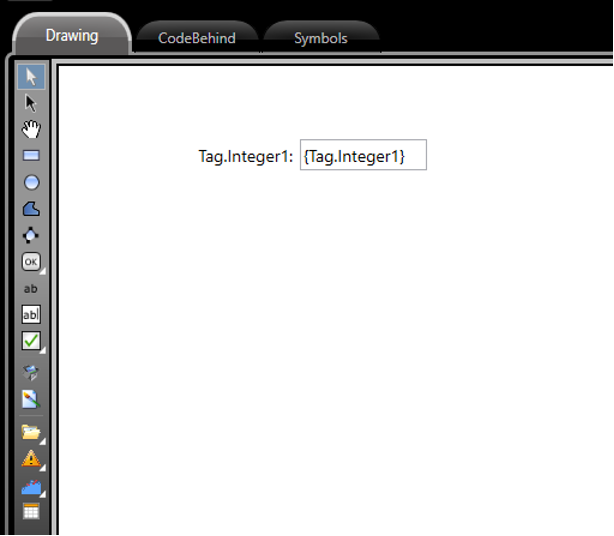
Navigate to the Draw Environment, at the desired Page. Right-click at the display and select Paste. You should see the Tag being inserted into the display, already formatted with a TextOutput, for label, and a TextBox for displaying value.
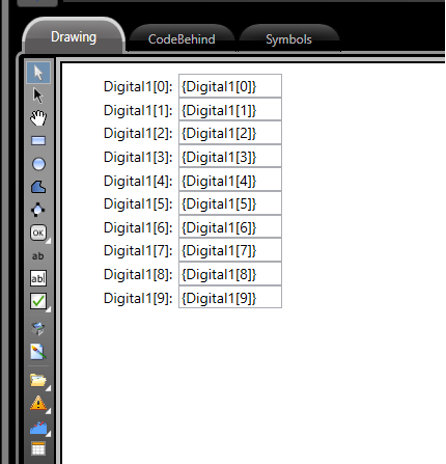
The same logic can be applied for array Tags. Copy the Tag row from Edit-Tags-Objects related to Digital1 Array. All elements should appear formatted when Pasted into a page.
Lastly, for a Custom Type Tag, Copy the Parent element from Edit-Tags-Objects and Paste it into your page. The child elements will be automatically formatted at the Display.
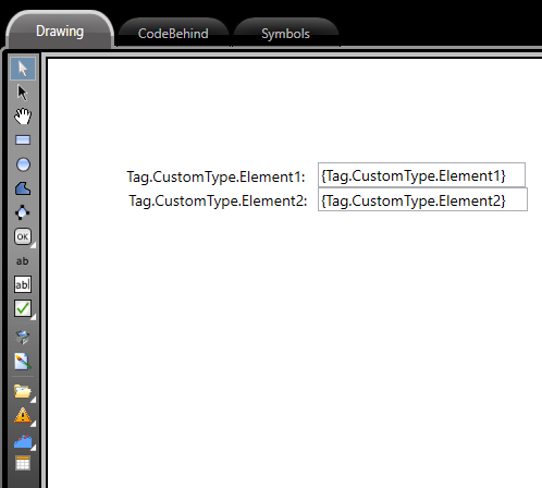
When exists symbol with the same name of custom type, the copy and paste of a tag from this custom type to a page will not paste the tag to a Text Output, it will paste the symbol with the tag already configured.
Example
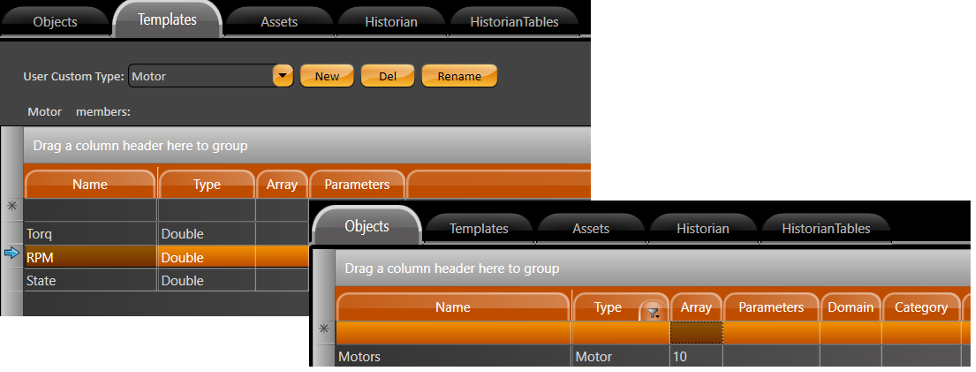
Custom Type “Motor” and tag array Motors for motor type.
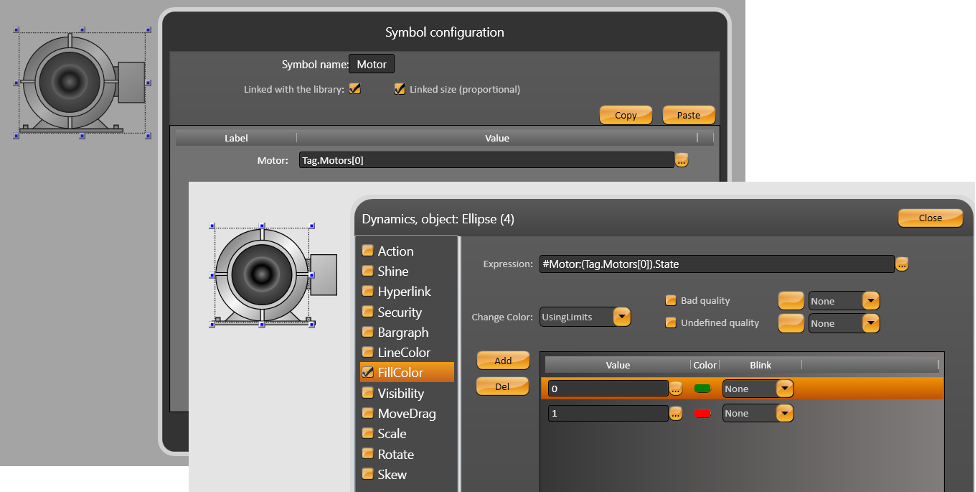
Below is the “Motor” symbol using the motor custom type:
Executing copy of Motors tag to a page will past all motors symbols created and configured with the right tag:
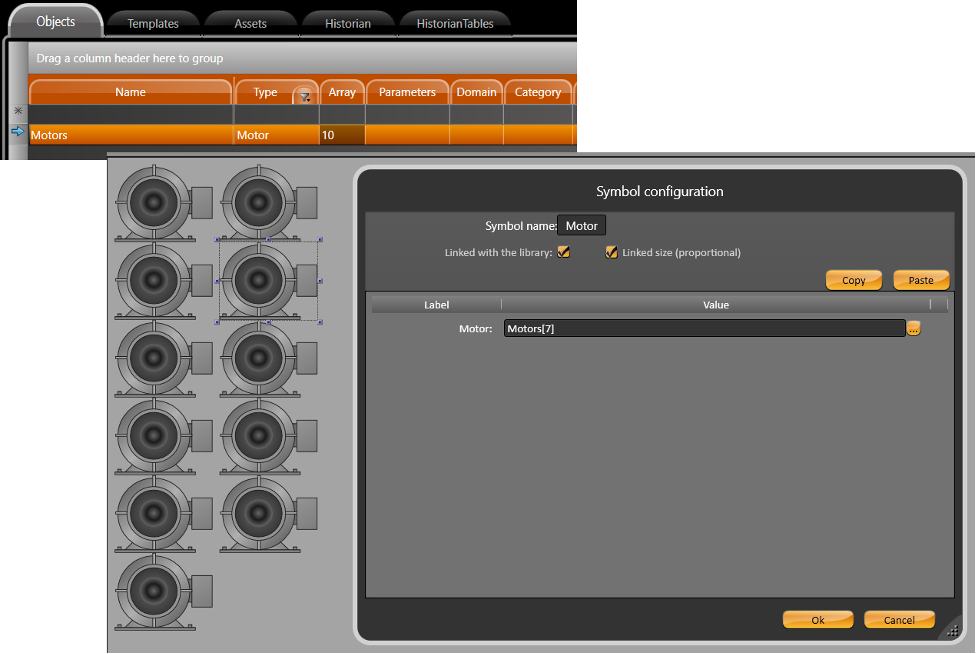
It is possible execute this operation with custom type inside of custom type with several different custom type at same time.