Page Tree
Previous Releases
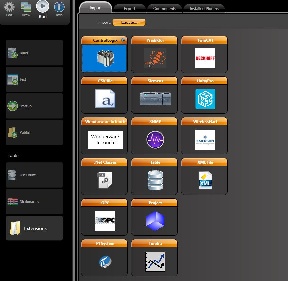
In Run-Extensions-Import, you can find a set of wizards that import project components. The contents displayed in this interface are dynamically created according to the DLLs found in the IMPORT folder of the project installation. System Integrators and other partner companies can create import wizards using the Toolkits.
The built-in Import tools installed with the product are:
Import FactoryStudio Projects: Add the components of the selected project into the current project.
Import Rockwell ControlLogix: Creates the Tag Names and Tag Templates as well as does the mapping of the PLC addresses, all according to the information available in the L5K file.
Import OPC server configuration: Creates the Tag Names and Tag Templates as well as does the mapping of the OPC Client addresses, all according to the information available by browsing to the OPC server.
Import From OSIsoft PI System: When connecting with PI System Historian Servers, this wizard automatically creates a link with the tags, elements, and attributes from the PI AF servers. When connecting with PI AF, the system automatically imports the definition of all templates and asset elements in the selected database. It also maps to communicate with the server.
Import SNMP: Creates the Tag Names and Tag Templates as well as does the mapping of the SNMP device.
Import from Datatable: Creates the Tag Names and Tag Templates from DataTables on external database. (SQLServer, Oracle, or anyone configured in the dataset module).
The Import PI wizard will only appear on licensed installations where the PI Connection extension is enabled.
Importing XML tag templates: Creates tag names and tag templates according to the data structure of the XML file. This wizard also creates the Edit-Datasets-Files configuration to read the file.
Importing .NET classes from a DLL: Creates tag templates that matches the selected .NET classes.
If you want to import tags from a device or a file you can follow some steps. There is two ways to do this:
1 - The first is in Run > Extension > Import , double click in your option and go to Appendix A.
2 - The second is in Edit > Devices > Nodes. You just have to click on the "Import" button. Go to Appendix A.

Appendix A
The following dialog will open and you can choose the way of importing, it can be through the device or a file. If it is a file click in the button indicated in the image below and choose the file. Now, just click refresh and wait for the tags to be loaded.
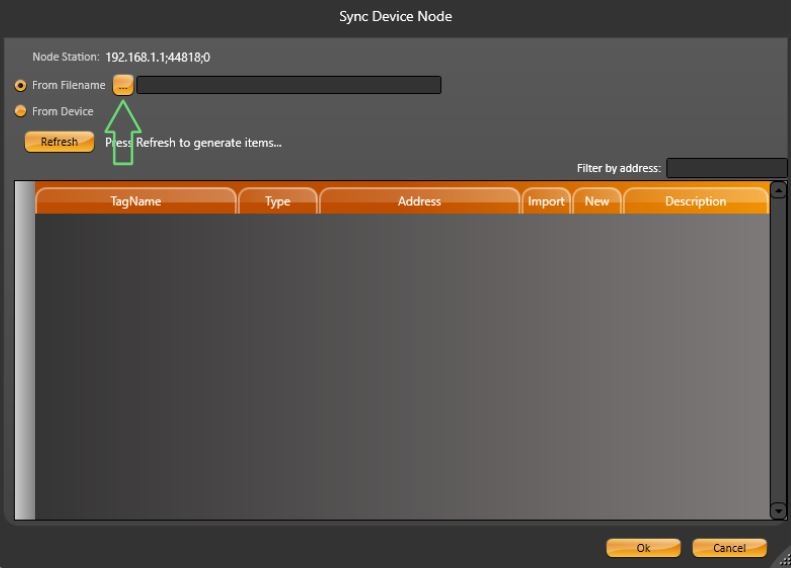
Note
To see the information you have to assure that you refresh the interface clicking in "Refresh".
The last step is to click on "Ok" button and you can see the tags imported in Edit > Tags.