Page Tree
Previous Releases
The Engineering Workspace is a comprehensive user interface that provides the tools and information you need to configure every aspect of a FactoryStudio project. Users typically refer to this interface as the Manager interface or as the Project Manager. This is because the application file that implements it is the TManager.exe.
Once a selected project has been loaded, the user is provided with an interface similar to a web browser with a back button, a list of recent items, and other navigation tools. This is the main window used for project configuration.
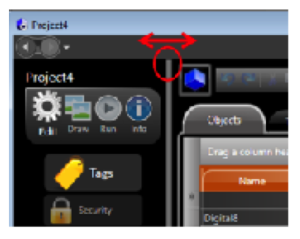
When you want the workspace to be larger, you can use the mouse to drag the vertical bar and adjust the size of the left menu frame.
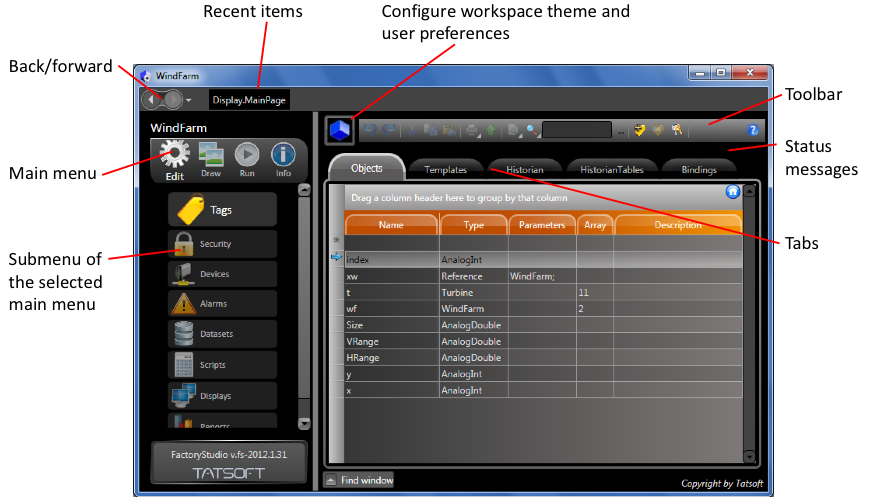
The toolbar at the top of every page has the typical toolbar buttons: undo, redo, cut, copy, and paste. It also has buttons for common functions that are unique to FactoryStudio.
In addition, some buttons have additional options when you right-click them. For example, the print button gives you the option to either print or save to a CSV file. Also, the find button gives you the options to find, go to the previous, and go to the next. For more information, see Working with DataGrid Tables below.
Undoing and Redoing Changes
The Undo and Redo buttons on the toolbar let you undo or redo any operation. When editing tables, undo and redo are available for all changes during your editing session. When editing documents (in the Reports and Scripts sections or in the Draw environment), undo and redo are available until you save changes.
Smart Cut, Copy, and Paste
The Cut, Copy, and Paste buttons are context sensitive. When the focus is on a DataGrid, they will cut/copy and paste the selected rows. When the focus is on the drawing tool, they will cut/copy and paste the selected objects. The reason for the smart in Smart Cut, Copy, and Paste is that you can copy and paste rows to and from Excel as well as from other tables in the workspace. This can be done even if the columns are not all the same. When copying and pasting, the column titles are also copied to the clipboard. The system is able to put the information in the right columns, no matter what order the columns are in or even if some columns are not present in the target table.
When copying from Excel, make sure to select the row titles. You can also copy rows from the Tags tables and paste them directly to the Historian which will enable data logging of the tags.
Print, Save to a File, or Import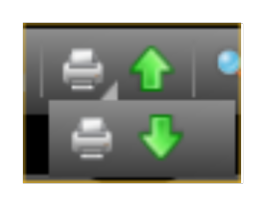
The print command allows you to print the selected document (either a DataGrid or a Drawing). The export button will save DataGrids to a CSV file and will save graphical displays to JPG files. The import button will import CSV files to the DataGrid.
Finding Objects
You may want to find the location of specific objects you used in a project. The Engineering workspace provides three ways to search for objects.
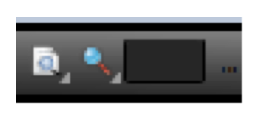 Find String button and Find Object button
The Find String button is used to search for a specific string in the current tab of the current Datagrid. Type the string you want to search for in the text box and press the FindString button.
The Find Object button on the toolbar accesses the object cross reference, which lets you find where objects are used in the Project and go directly to each location. For more information on cross reference, see Cross Reference under Productivity Tools below.![]()
Finally, you can filter the rows displayed on the Datagrid by typing a mask string in the input field. Standard wildcards are supported. For example, if you set the filter to "abc" the display will show only the rows with the letters "abc" in the name. A filter of "ab*" will show the rows with names starting with "ab". Click on the Home button to clear all the filters and reset the viewing state of all the datagrid columns to the system default.
New Tag and Tag Properties![]()
New Tag: allows the creation of a new tag in the real-time database.
Tag Properties: shows the properties of the tag selected in the text box.
Security Logon![]() The tooltip shows the currently logged-in user. When you click on it, the Logon Dialog will open. By default, the Guest user is logged in when the system starts.
The tooltip shows the currently logged-in user. When you click on it, the Logon Dialog will open. By default, the Guest user is logged in when the system starts.
Help Button
![]() The Help button displays the Info-Help section, which provides access to the local help file. It also opens the online user documents.
The Help button displays the Info-Help section, which provides access to the local help file. It also opens the online user documents.
Navigation in the FactoryStudio workspace is based on a hierarchy of user interface screens with three levels: environments, sections (or modules), and tabs.
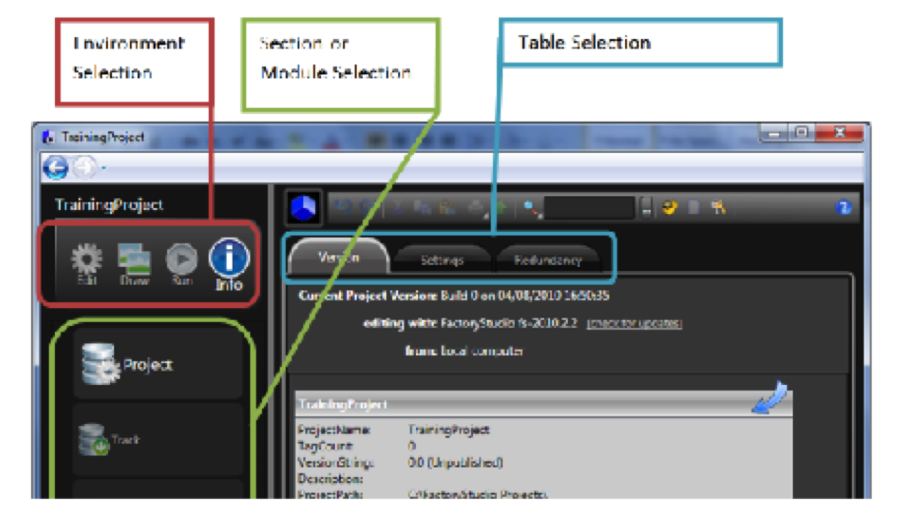
Any Engineering workspace is identified by 3 names: the Environment (main menu on top left), the Section (or sub-menu), and the Tab (or Table). We use the shorthand notation explained below to get to a specific location.
For example, rather than saying:
Click Edit, then click Tags, then click the Objects tab.
We say:
Go to Edit > Tags > Objects.
This shorthand notation quickly tells you how to navigate to the correct main menu, section, and tab.
On the highest level, there are four environments: Edit, Draw, Run, and Info.
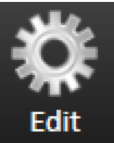
To configure the basic elements of your project, click on the "Edit" icon in the main menu. This displays an index of all the main sections. They are:
![]()
The "Draw" icon allows you to configure dynamic displays. Select the Display on Edit-Displays and click on the Draw icon to access the graphic designer.
![]()
The Run environment provides access to all project execution commands. This environment displays an index as follows:

The "Info" icon provides access to current project information in the following categories:
Most tabs in FactoryStudio display information in a table. All tables use the same method to manipulate, copy, paste, and import data.
Editing Tables
Most configurations from the Edit menu (such as tags, alarms, and users) are stored in tables. In most tables, you can add and edit information the same way.
To add a new table item (row):
![]()
After you click a column in the row, the * becomes a pencil icon, showing that you are now editing that row. ![]()
To edit an existing table row, click the column in the row that you want to change and do one of the following:
More than one person can edit a project at the same time. The system saves all changes to the project server and propagates the changes to other users. If two users modify the same configuration table or document, the changes from the last person who saves would overwrite any previous changes.
Tooltips and Validation
Throughout FactoryStudio, fields and buttons have tooltips that contain information about the field or button. Tooltips appear when you move your cursor over the related field or button. Some tooltips include an example that can help you.
The system also validates whatever you enter into most fields, especially in tables. Validation rules may check that the input is in a correct format, that values are within the appropriate range, and other factors. The exact rules depend on the specific item. If you see a red outline around the table cell, the entry is not valid.
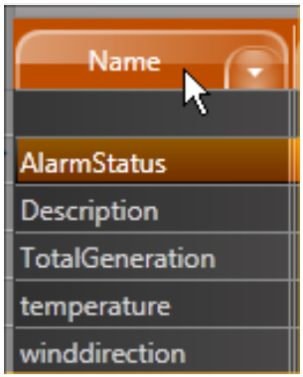
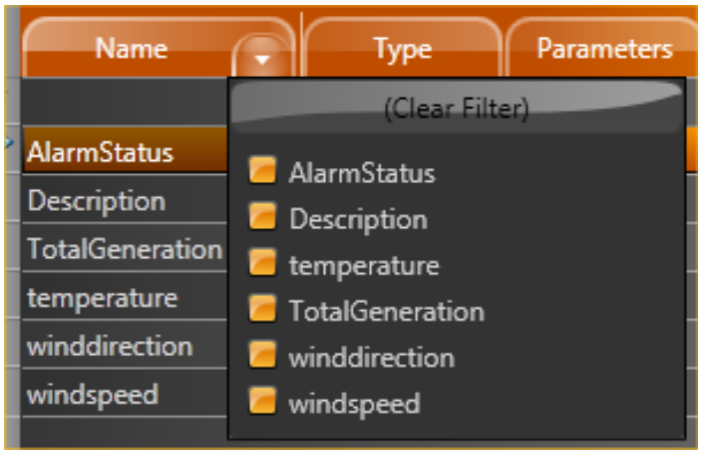
Sorting, Filtering, and Grouping
Information in many tabs is shown in tables that you can sort, filter, and group. By default, items in a table are listed in the order in which you created them.
To sort a table:

To filter a table:
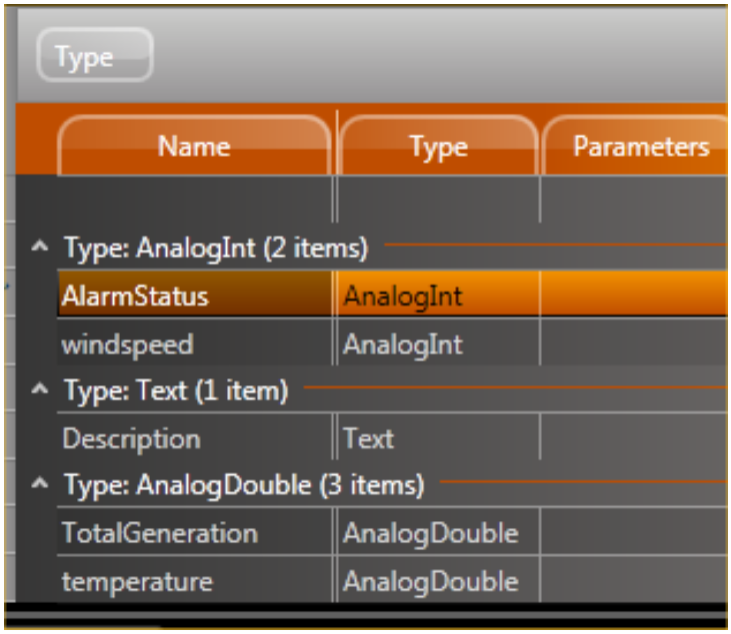
To group items in a table:
Adding and Removing Columns
Tables in FactoryStudio display a default set of columns. Every table has additional columns that you can display, and you can remove any of the default columns. You can also change the order of the columns.
To add or remove a column:
Common Column Definitions
Several common columns are available in most tables. These columns are defined below.
Column | Description |
ID | Database ID assigned to the object in the table. Numbers are assigned starting from 1 for the first object created and continue as needed. The IDs are unique only to a specific table. |
Level | Select the level you want to associate with the tag on the Assets tab. See Creating Assets in the chapter Tags, Assets, and Templates. |
Category | Select one or more categories for this attribute. See Categories Dictionary below. |
DateModified | Date the object was last changed. |
DateCreated | Date the object was created. |
Description | Enter a description of the object. |
Copying and Pasting Rows
You can copy and paste rows into and from tables in FactoryStudio. The smart copy/paste functions let you copy rows from one table to another within FactoryStudio. For example, you can copy tags and paste them into the Historian tab or the Items tab under Alarms. You can also copy and paste to and from a spreadsheet. In addition, you can import a comma-separated values (.csv) file into any table. Column headings must match the table you are importing into. The best way to ensure that the headings match is to copy rows into a spreadsheet first, then edit the spreadsheet.
Copying and Pasting Within FactoryStudio
To copy rows to another tab in FactoryStudio:
Copying and Pasting To or From a Spreadsheet
To copy rows to a spreadsheet:
To paste rows from a spreadsheet:
Importing Data
The system imports the data into the table.
This section explains FactoryStudio's major tools and features that are included to assist with common tasks.
Intellisense
The Intellisense feature presents a list of valid objects according to the characters you type into a specific input field and a list of the valid entries for that field. You can insert a selected item from that list by pressing enter, space, the dot key, or another symbol key. All the input fields that use tag names or object names, either in the datagrids or in the drawing tools, are enabled through Intellisense. The Intellisense fields have built-in tooltips and validation. Putting the mouse over a field will present the expected entries to that field. When you have an invalid input, the border of the field will become red and the tooltip will show the error.
Refactoring
Refactoring is the procedure of changing the definition of tag names or object names (such as alarm groups, device nodes, etc.) after the symbolic name is already in use in the application. Thanks to the centralized SQL configuration, FactoryStudio allows you to rename any object by simply typing the new name in the configuration table where that object is defined. All the references to that object will remain valid, using the new name with no actions required. For instance, to rename a tag that is already being used all across the project, just go to Edit-Tags-Objects and rename it. The same applies to Edit-Alarms-Groups, members of templates, or any named object in the system.
Cross Reference
You can view how many times each object is used in the project, and you can view a list of objects that are not used in the project.
There are three distinct ways to select the object for which you want a cross reference.
1. Do one of the following:
2. Click Find or, from the Select Object window, click OK. The search results will display in the Find window at the bottom of the page.
3. Double-click any row in the find results to go to that item.
4. To close the results pane, click Find window at the bottom of the page.
To track the number of times an object is used:
The table lists the number of references to every object in the system. To view objects that are not used, click the UnusedObjects tab. For a complete cross-reference of all objects, click the CrossReference tab.