Page Tree
Previous Releases
...
To configure this client, the following steps are required:
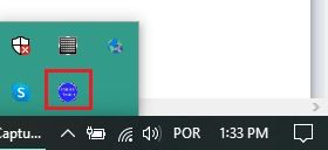
Step 1: The TMQTT Broker must be running. (look Look for the icon in the Windows TaskBar).
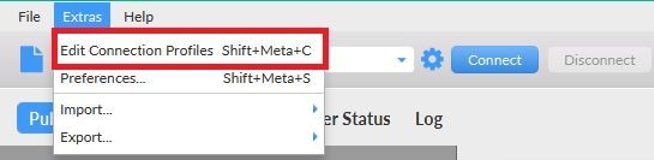
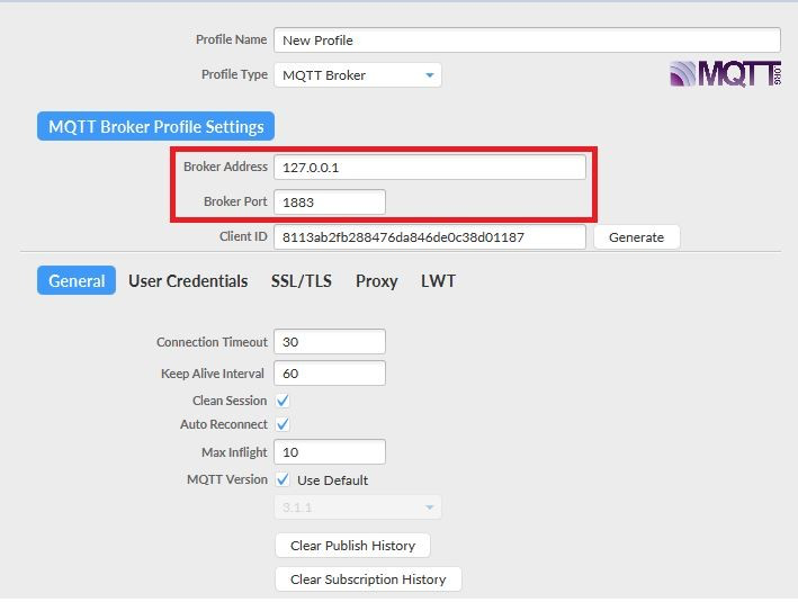
Step 2: In the Clientclient, go to Extras > Edit Extras>Edit Connections Profiles. In the opened Window you will fill the properties In the window that opens, fill in the MQTT Broker Profile Settings according to your Broker broker (e.g.: Broker Address and Broker Portbroker address and broker port). Then, click on connect.
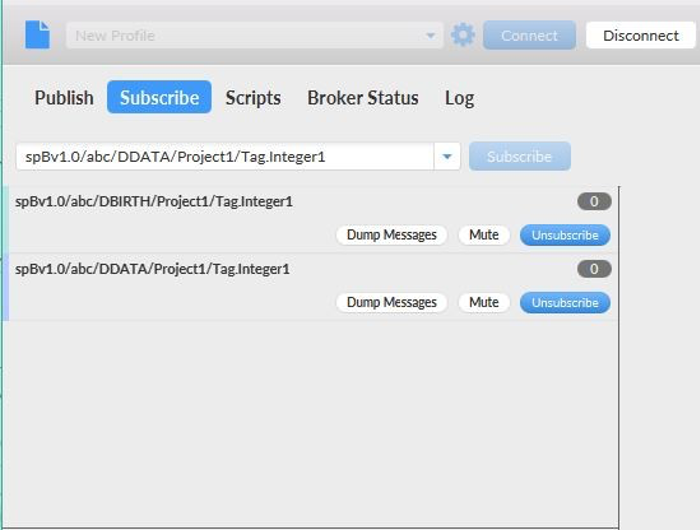
Step 3: In the subscribe Tab tab, the Topic topic will follow the syntax below:
| Code Block |
|---|
spBv1.0/<Group_Id>/<message_type>/<Project_Name>/<MQTT_Device_Name> |
Let’s imagine an example , in which the Project Name project name is ’Project1’, and we have an integer tag called ’Tag.Integer1’.
In this situation, order to correctly subscribe to the Tagtag, first you need to create a Device Birth Certificate (to start device birth certificate, which starts the communication channel).
| Code Block |
|---|
spBv1.0/TServer/DBIRTH/Project1/Tag.Integer1 // create channel for this specific tag // or spBv1.0/TServer/DBIRTH/Project1/Tag // create channel for all tags |
...
| Note |
|---|
It is worth mentioning that for an array Tag it is its not required to point to each element individually for an array tag. The broker is smart enough to fetch all data by just receiving the main Tag tag element. The same happens for Tags tags with Template Datatypestemplate datatypes. |
There are some other is more data that can exchange be exchanged between the running project and TMQTT Broker. Some examples can be seen below.
...
| Info |
|---|
The client is case-sensitive. If the Topic topic is not fetching data, check for possible typos in the subscribed topics. |
...
Step 4: After subscribing for the desired topics, the exchanged data can be seen in the top - right corner.
| Note |
|---|
You must change the Payload Decoder to Sparkplug. |
...