Page Tree
Previous Releases
...
If you have not signed in to Azure, a pop-up will show in the bottom right corner to prompt you sign in to Azure (3).
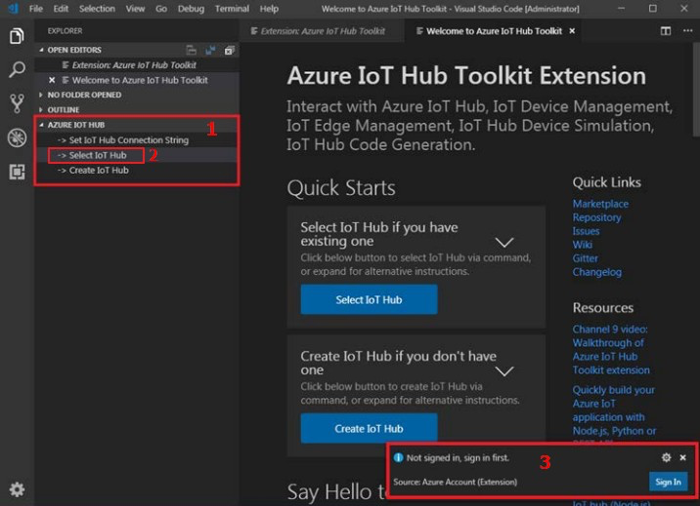
Azure IoT Extension Setup.
After you sign in, your Azure Subscription list will be shown, then select Azure Subscription and IoT Hub. The devices and endpoints list will be shown in ”Azure IoT Hub” tab in a few seconds.
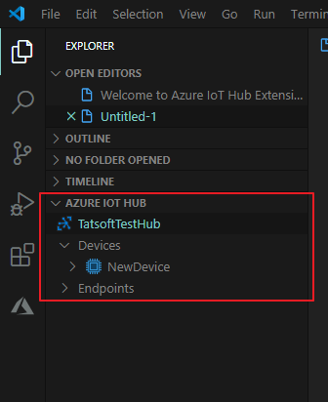 Devices in IoT Hub.
New IoT Devices can be created through this extension. From the context menu (1), click Create Device (2) and enter a Device ID for the new IoT device.
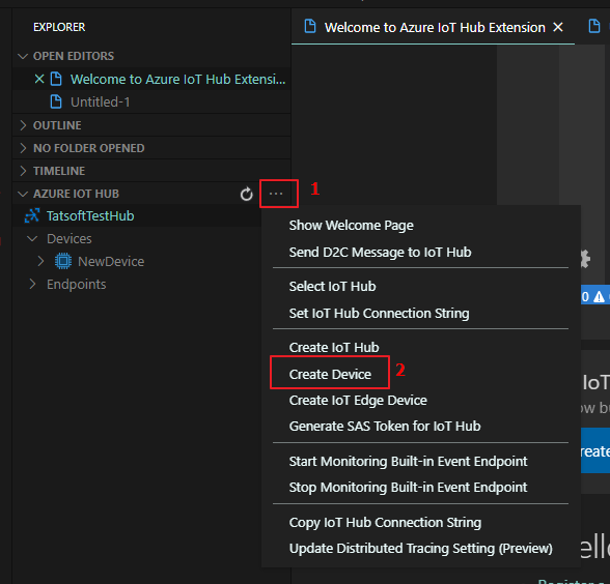 Device creation.
Now that we have our Devices created, we will need to get our Connection String and SAS Token.
Right-Click on the Device and select ”Get Device Info”. You should see some information displayed at the Output Window.
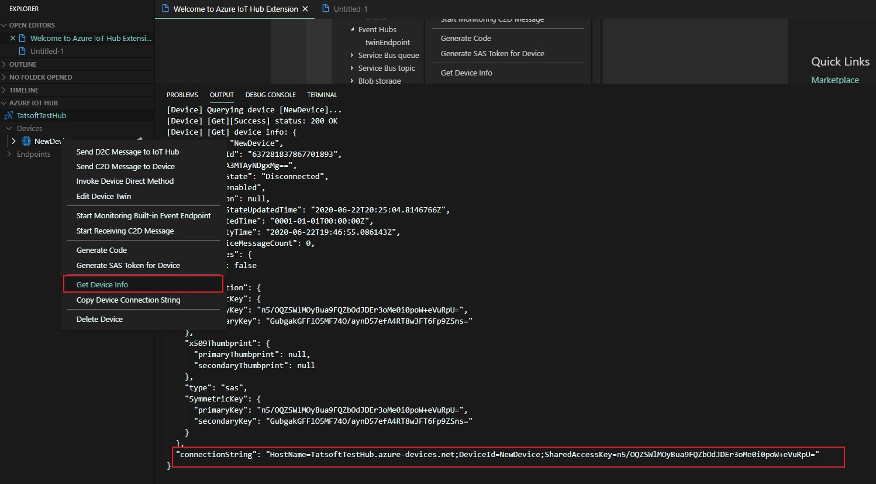
Connection String.
Review the Connection String created for the device and record the following pieces of information from this string:
...
Again, right-click the device and select ”Generate SAS token for device” and enter the expiration time. You should see some information displayed at the Output Window.
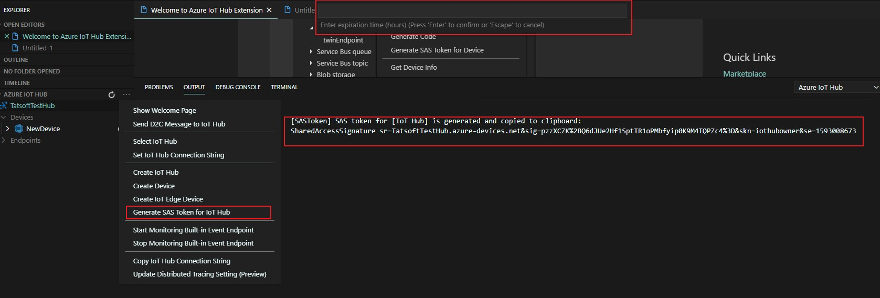 SAS Token.
Record the following pieces of information from this string:
...
To verify that data is flowing from MQTT Driver to the cloud-based Azure IoT Hub, right-click the device entry and select ”Start Monitoring Built-In Event Endpoint”.
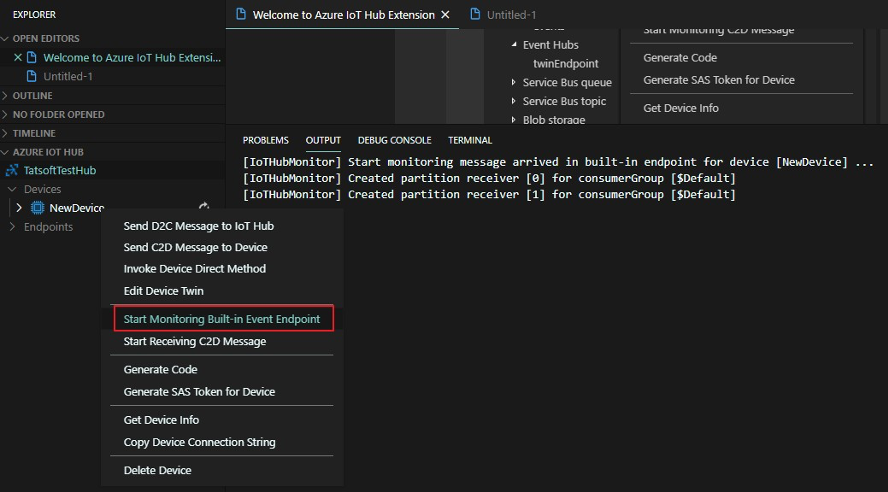
Enable Device Endpoint.
On your Project’s Engineering Environment, navigate to Devices > Channels and add a new MQTT channel.
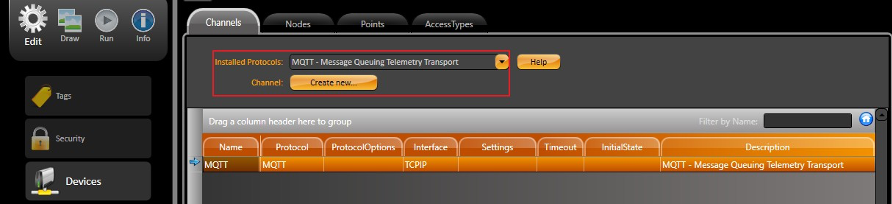
MQTT Channel creation.
On Devices > Nodes, add a node for the newly created MQTT Channel. The Primary Station configuration is done as follows:
...
| Code Block |
|---|
URL = TatsoftTestHub.azure-devices.net Port = 8883 Client ID = NewDevice Username = TatsoftTestHub.azure-devices.net/NewDevice Password = SharedAccessSignature sr=TatsoftTestHub.azure-devices.net&sig=pzzXCZK%2 BQ6dJUe2Hf1SptTR1oPMbfyip0K9M4TQPZc4%3D&skn=iothubowner&se=1593008673 TLS Version = <TLSv1.0> X059 Certificate = QoS = AtMostOnce Keep Alive = 1 |
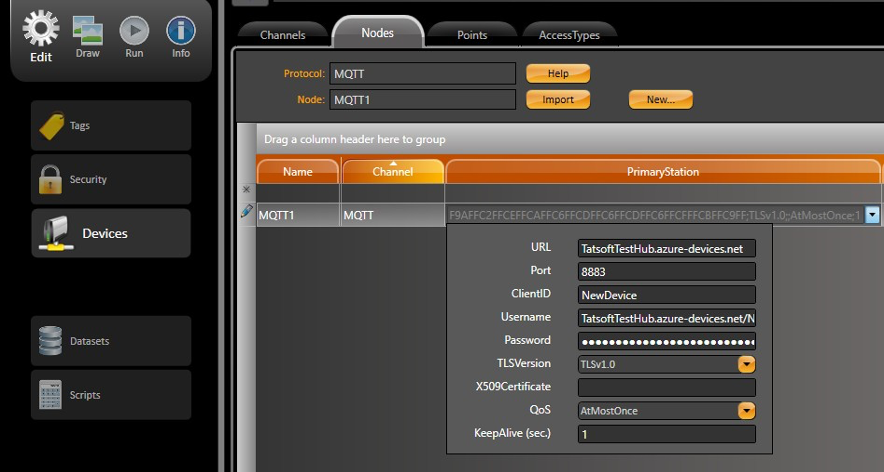 MQTT Node creation.
Lastly, on Devices > Points the Address information is filled according to the syntax below
...
| Code Block |
|---|
devices/NewDevice/messages/events/ |
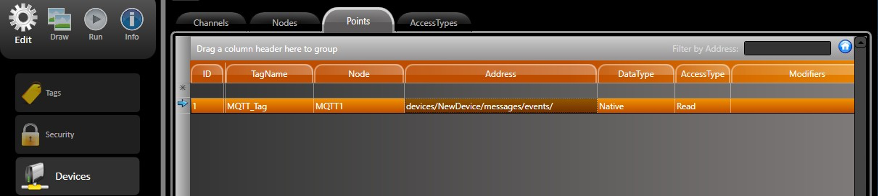
MQTT Point creation.
Once the Device configuration is complete, go to Run > Startup and execute the project. Open the Trace Window (with Debug and Devices options enabled) and monitor the communication exchange.
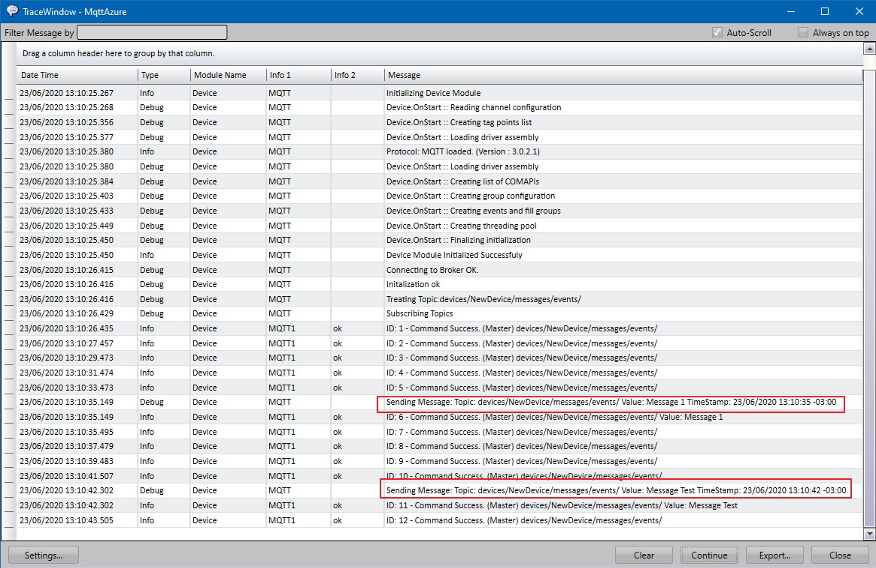
Trace Window logs.
Back on VSCode, you can see the received messages on the Output Window.
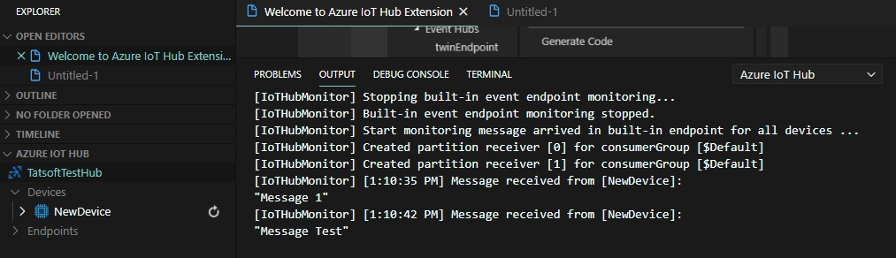 Messages received in VSCode.