In this scenario, we are importing items for each individual table that is available throughout the Engineering Environment.
In your Engineering Environment, you should find a toolbar located on the top of the display with green arrow in it.
In Tabs that do not contain a table, the import icon is unfocused and is unable to be selected.
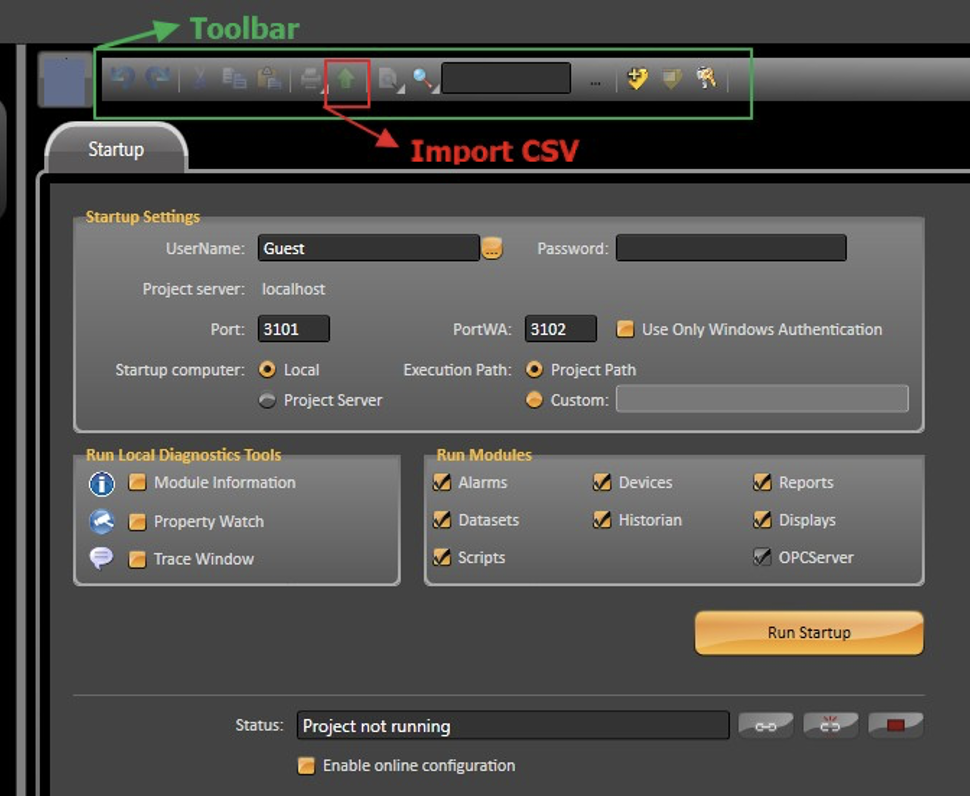
For Tabs that do contain grids, the import button is available when the grid is on focus (selected). When the import button is clicked on, a dialog window will open.
Browse for the csv file and click on Open.
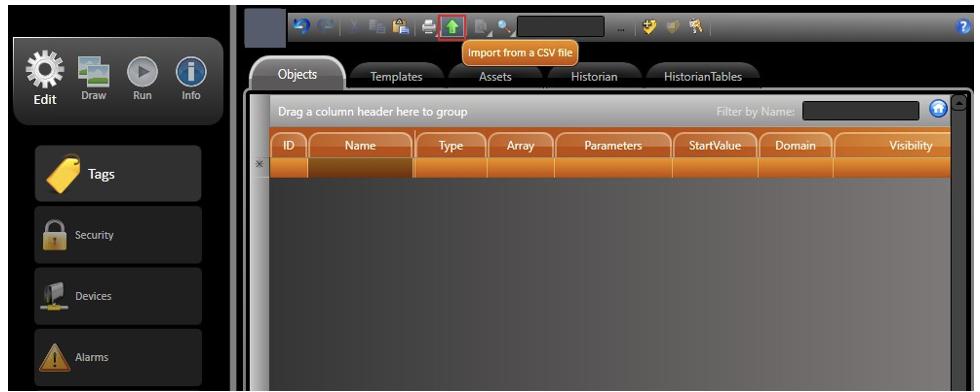
To better understand how to use this feature, we are going to add Alarm Items into our sample project.
Assuming we have two Tags, Tag1 and Tag2, in our project. Each tag must have an alarm configured to it.
1. Tag1 - Belongs to ’Critical’ Alarm Group and triggers an alarm when its value is lower than 20.
2. Tag2 - Belongs to ’Warning’ Alarm Group and triggers an alarm when its value is higher than 80.
The import steps are:
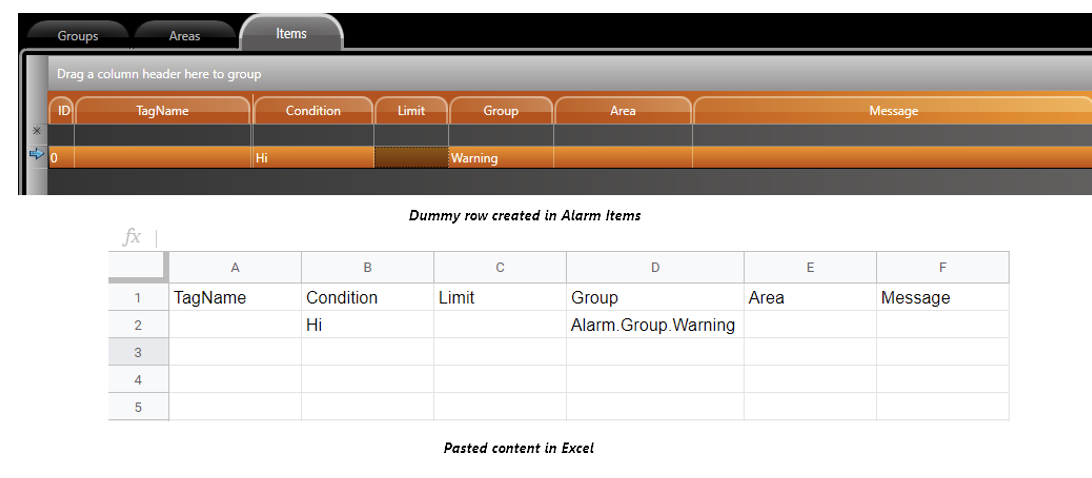
3. Fill your table with the required information.

4. Save the file as a ‘.csv’.
5. Go back to the Edit > Alarms > Items page and click on the ‘Import CSV File’ Button.

If you used a text editor (Notepad, Notepad++, etc), you need to add the comma separator (‘ , ’) between each column. |
In this scenario, we are using a single .csv table to import information on Tags, Devices, Alarms and historian items.
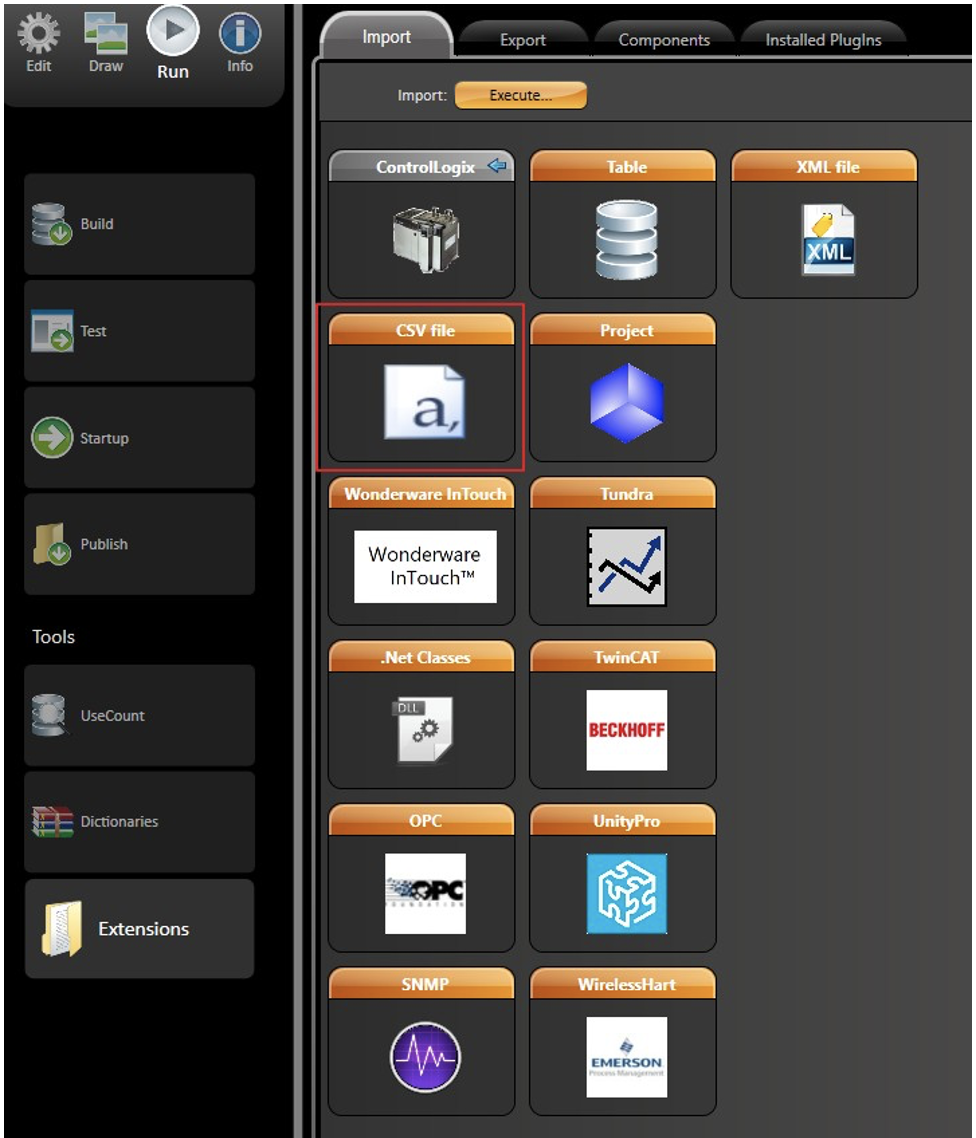
In your Engineering Environment, navigate to Run > Extensions > Import. You should see many supported files that can be imported into a project.
Select the CSV file and browse for your Table File.
The table must obey a certain format. The required columns can be obtained by following the same method as in the previous section; copy from project and paste on Sheet Editor.
The difference in this method is that the final table is a concatenation of the various grids from the project.
To illustrate the usage of this feature, we will add a couple of items to our sample project. The following items will be added:
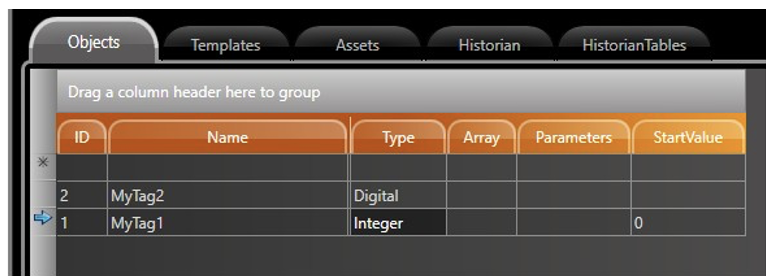
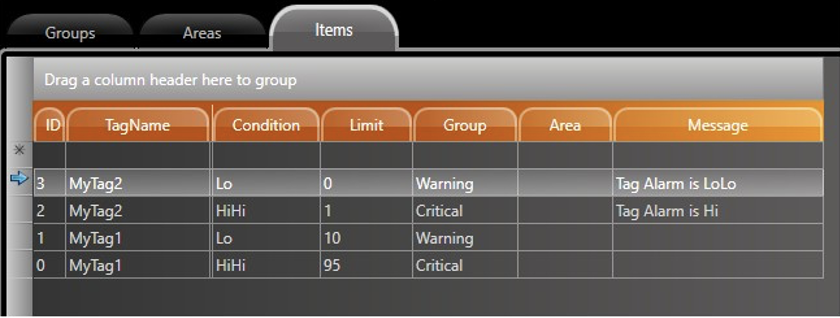
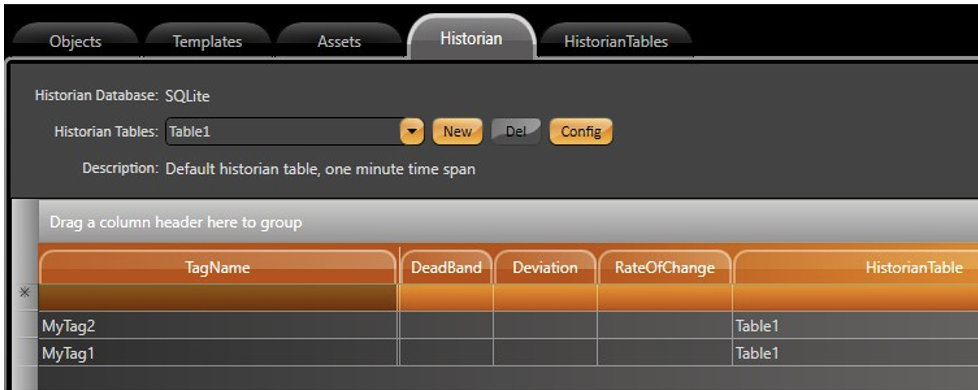
The table that contains all the columns and rows required to import the items described above can be found in the pictures below (with additional columns):
Following the importation procedure in Run > Extensions > Import, select the CSV option, browse for the filled csv file, and click on import.
In this scenario, we are using an API that allows C# or VB.Net applications to create and edit projects twith third party applications.
When the software is installed, it will install the Eng.Wrapper.dll inside the binaries folder (xx-2016.2). This is the file containing the EngWrapper API.
For this feature, you will need to have a C# or VB.Net IDE installed on your computer. We recommend Visual Studio, as there is a sample solution already developed for it.
Through this IDE, you will be able to call one method to create items in the project, without the need to manipulate the project database.
You must use a WebServer (TWebServer or IIS) configured to the software. When creating a new object for the Project class from EngWrapper, it will use the WebServer to connect to the project. It is recommended to close the project before using the EngWrapper API or to open the project as remote development. If you do not do this, you will see the created project configuration when you close and reopen the project.
There are more details on every available method for the EngWrapper API on the documentation that comes with the sample project. Contact support if you do not have the project files.
To initiate the project configuration, you need to connect to a project using the syntax below:
public Project( string projectFileName, string version = "xx-8.1", string server = "http://localhost/TProjectServer/", bool enableLogger = false, bool assetLevel = true) // Parameters: // projectFileName: Full filename of the of project file // version = Product version // server = TProjectServer path. Defaults: http://IPAddress:Port/TProjectServer/ // enableLogger = Flag indicating whether log is enabled // assetLevel = Indicates if the assetLevel is created |
For more syntax on the other project objects (Tags, Templates, Devices, etc.), see the EngWrapper documentation.
This section contains examples on API usage in the C# programming language.
Connect to Project:
Project project = new Project(@"C:\Projects\Project.tproj","xx-8.1","http://localhost/TProjectServer/",true) |
Add new Tag Name:
project.AddTag("Tag1","CommentTag1",Project.eTagType.Double,"V","25","0","800","","#1", tagDescription:"DescTag1");

project.AddTag("TagEnum1","CommentTagEnum1",Project.eTagType.Digital,tagParameters:"Enum=Enum1;", tagDescription:"DescTagEnum1"); |
Add Script Class:
string  script  =  "public  int  Add(int  a)"+ Environment.NewLine + "{" + Environment.NewLine +"\t"+
"return a + 1;" + Environment.NewLine +
"}" + Environment.NewLine;
project.AddScriptClass("class1",Project.eScriptCode.CSharp,Project.eDomain.Server,script); |
Add Device Node:
project.AddDeviceNode("Node1","Channel1","192.168.10.19;502;1","192.168.10.19;503;1","Node For Channel1",0); |
Add Device Point:
project.AddDevicePoint("Tag1","Label for Tag1","Node1", "40001",Project.eDataType.Native,"", "ReadWrite",Project.PrepareScaling(0, 65535, 0, 800)); |