Page Tree
Previous Releases
| Easy Heading Macro | ||||||||||
|---|---|---|---|---|---|---|---|---|---|---|
|
If IIS is located when you install FactoryStudio
, you will not be able to install our embedded web server
, TWebServer.exe
.
The FactoryStudio software will run without the
web server. Most FactoryStudio engineering and runtime tools run without needing to install our TWebServer or doing any IIS configuration. TWebServer.exe is needed for remotely accessing project configurations and serving runtime web pages.
If you want to
enable remote engineering access and
web clients using IIS, you need to install some FactoryStudio services in IIS
. This page explains how to install FactoryStudio services in IIS; the explanation is for IIS 7.x, but other versions should be similar.
IIS is also necessary when you want to run the
Runtime as a Windows Service
and still be able to provide
web pages, iPad
clients, and
To enable the TWebServer, stop the IIS server or other applications that use port 80, and run the product installation. To setup the IIS server, follow the procedure in this chapter.
This section explains how to install these services in IIS. This explanation targets IIS 7.x and 8, but other versions should be similarremote engineering.
You are going to install three services inside IIS:
This procedure was executed on Windows 7, x64, with IIS 7.5. With older operating systems and versions of IIS, the procedure may be slightly different, such as defining a “Virtual Directory” instead of “Add Application”.
| Page Tree | ||
|---|---|---|
|
| Table of Contents | ||||
|---|---|---|---|---|
|
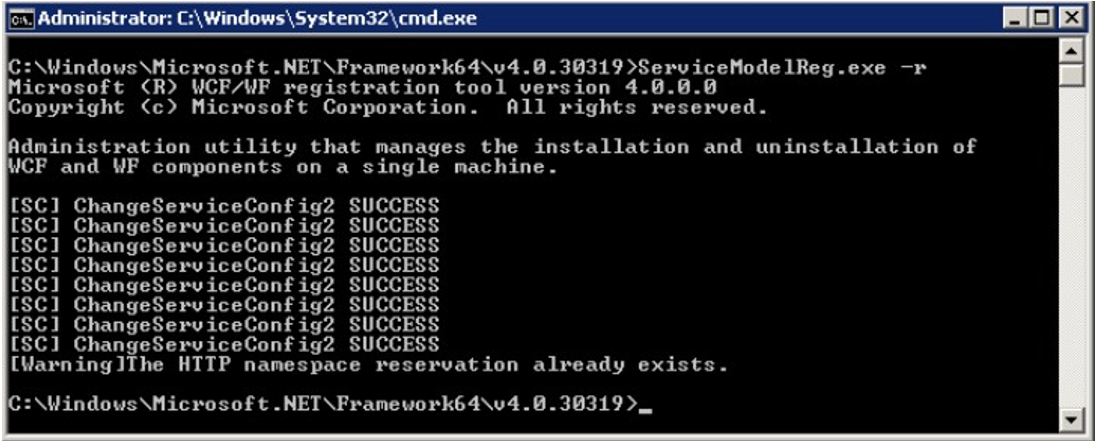
If IIS was installed after the installation of the .NET Framework, it is necessary to you must run and verify the procedure described on on http://msdn.microsoft.com/en-us/library/ms752252.aspx . This will , which is to run the following programs using the command prompt as Administrator:
aspnet_regiis.exe -I -enable ServiceModelReg.exe -rMicrosoft .Net is installed in one of the following folders:”aspnet regiis –i –enable” (from the .NET Framework installation directory*)

”ServiceModelReg.exe” -r (from the .NET Framework installation directory*)
| Note |
|---|
Usually, the .NET Framework installation directory is: C:\Windows\Microsoft.NET\Framework\v4.0.30319 |
, or C:\Windows\Microsoft.NET\Framework64\v4.0.30319 (for |
x64 Windows) |
Go to Program and Features. Choose,
then click“Turn Windows features on or
off”off“.

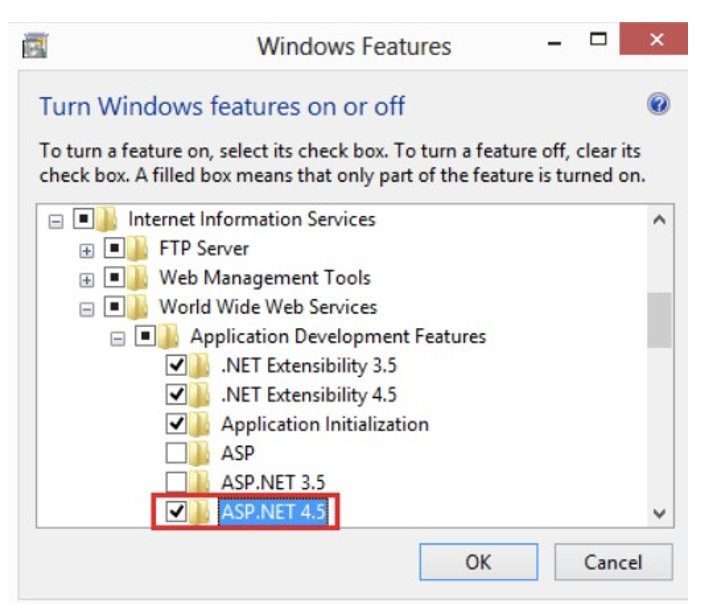
Enable the ASP.NET 4.
7 option. Navigate the tree:5 option (Internet Information Services > World Wide Web Services > Application
DevelopmentDevelopment Features > ASP.NET 4.
75:
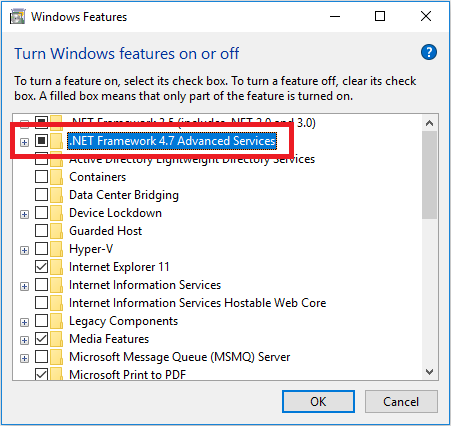
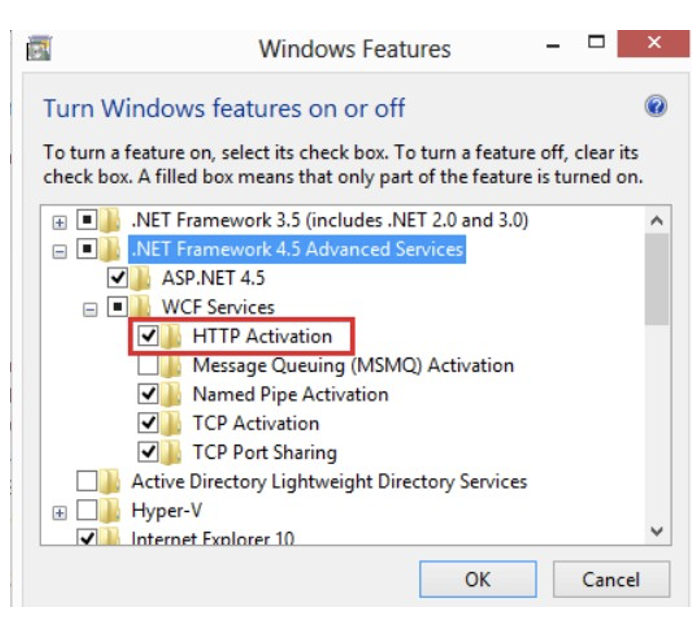
Enable the HTTP Activation option (
underunder .Net Framework 4.
75 Advanced Services)
.

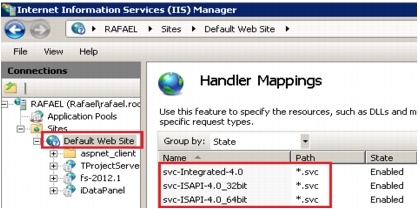
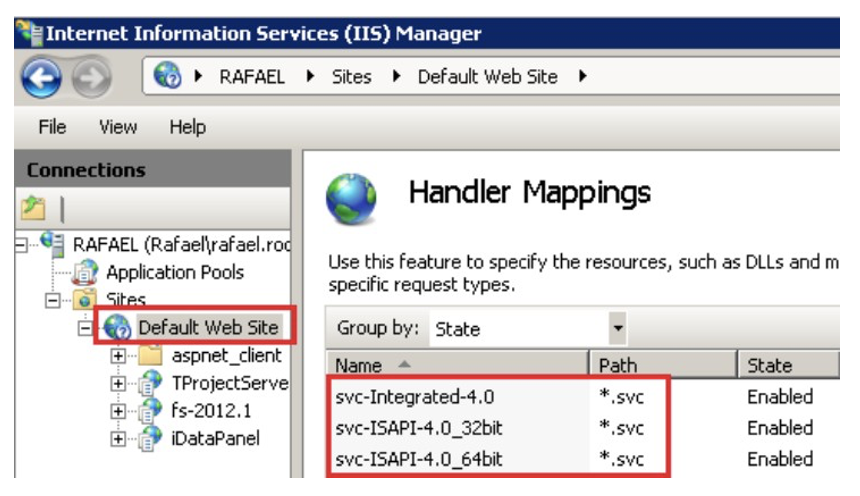
3. From the IIS Manager, verify that the .svc extension is mapped to aspnet_isapi.dll.
| Note |
|---|
For .NET Framework versions newer than 4.5, the ASP.NET will be different (the same as the Framework version). But the configuration remains the same. |
Verify that the extension ”.svc” is mapped to ”aspnet isapi.dll” (The msdn.microsoft website, on the previous link, explains how to verify this for many IIS versions.)
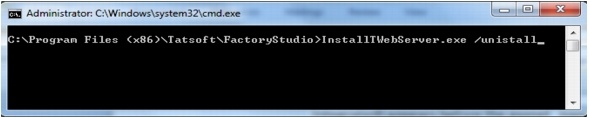
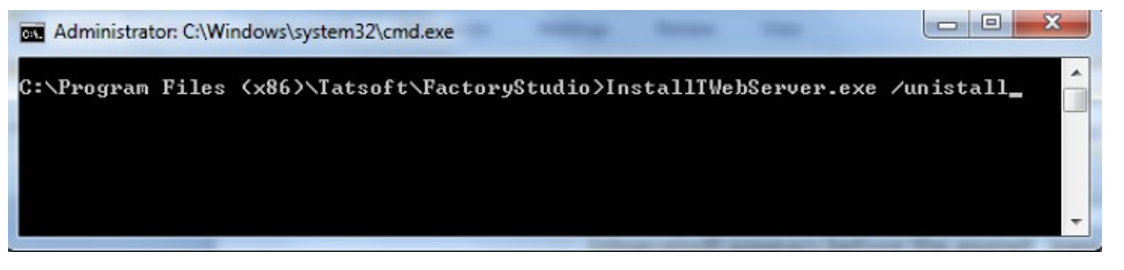
From within the Factory Studio 4. From the FactoryStudio installation folder, run the utility:
| Code Block |
|---|
InstallTWebServer.exe /uninstall |
This , which will remove the default TWebServer installation.
.
Before configuring any application for IIS, it is recommended to verify that IIS is working. To do so, open ”Sites/Default Web Site/Edit Permission”, and check if it is linked to the wwwroot folder.
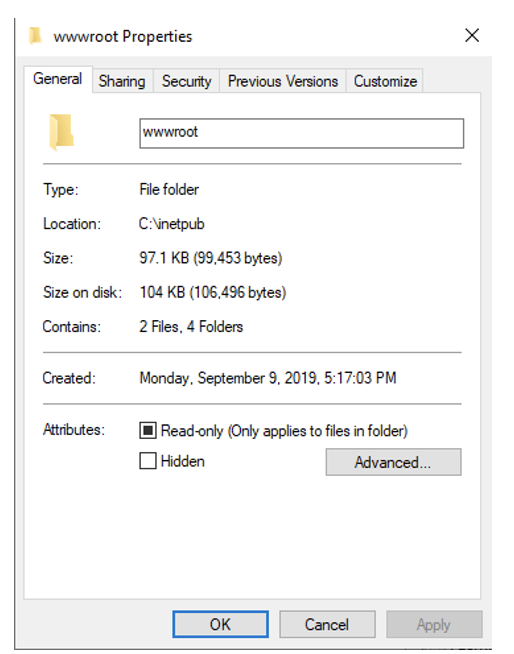
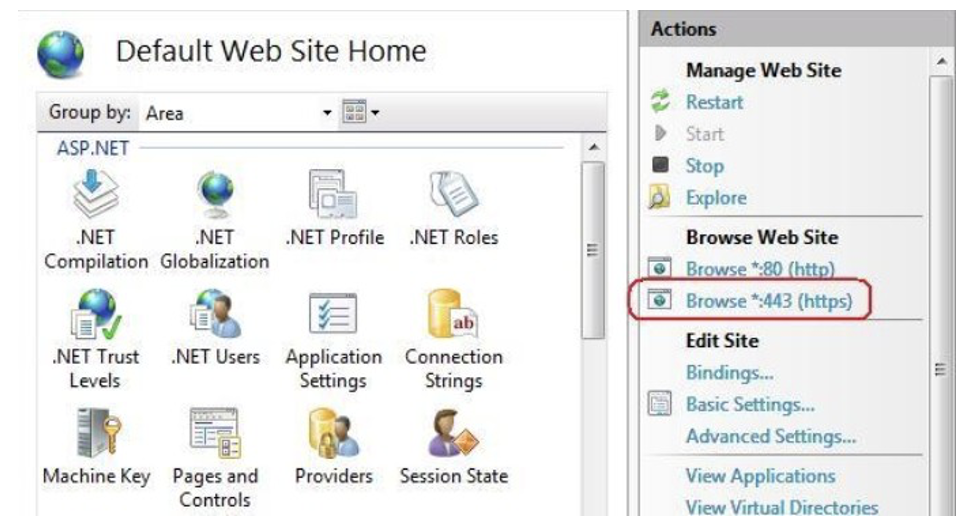
If so, go to the Actions pane and under Browse Web Site, click the link associated with *:80(http).
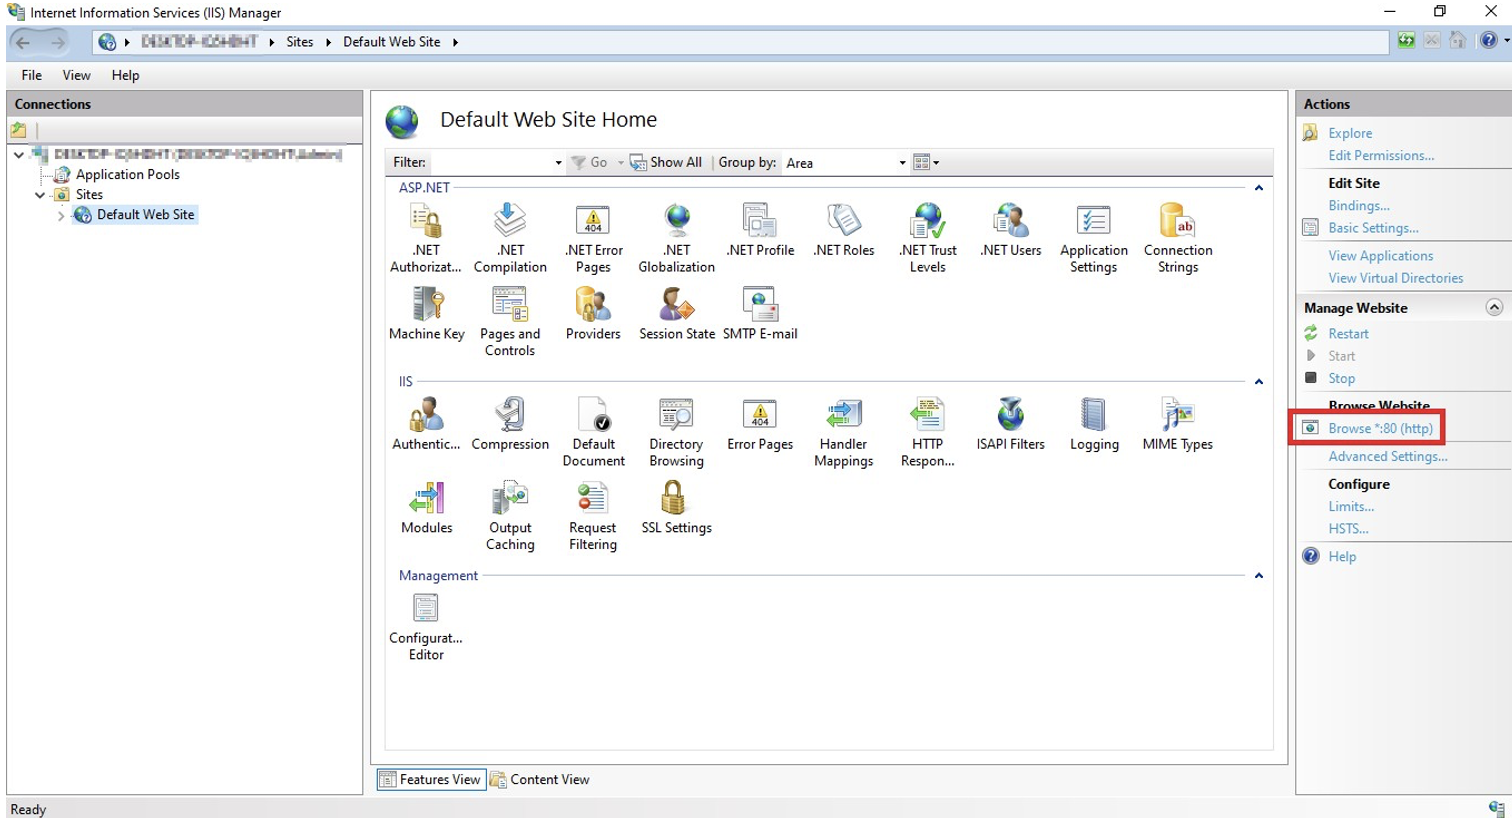
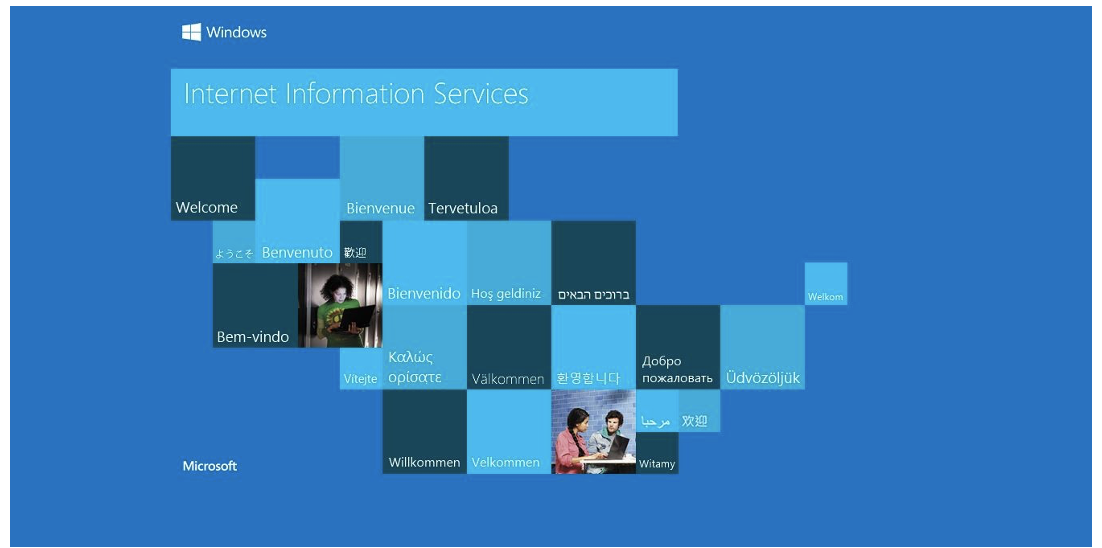
A default IIS image should open on your browser.
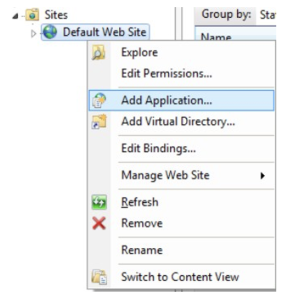
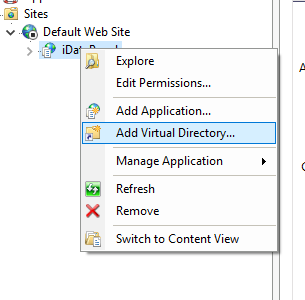
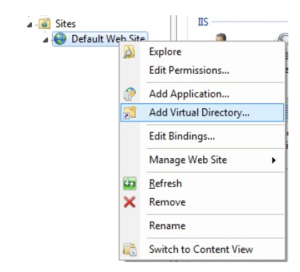
After making sure the IIS is working, open ”Sites/Default Web Site/Add Application” 5. From the IIS Manager, go to Sites > Default Web Site > Add Application and configure the information for the services as described in following steps
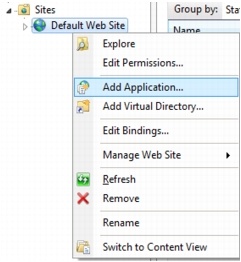
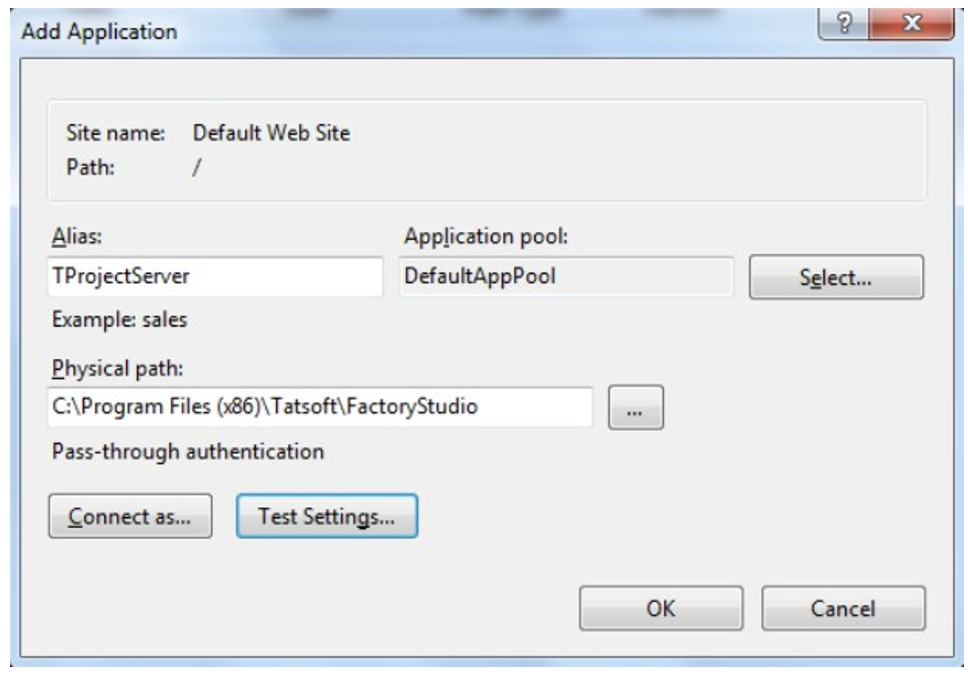
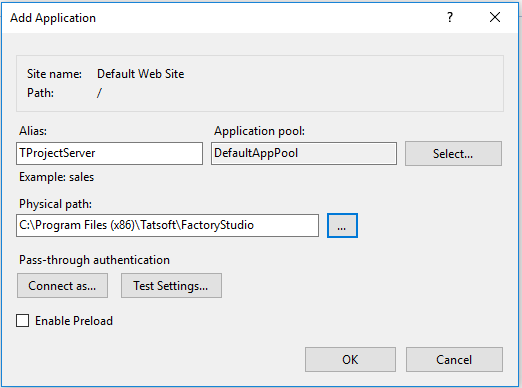
6. For the TProjectServer, configure:
:
TProjectServer:
| Note |
|---|
You should allow “Everyone” access |
to at least read. |
| Note |
|---|
You must allow the “<ComputerName> IIS IUSRS “ user to read and write on the directories of the projects. Example: For C:\FactoryStudio\Projects\<ComputerName>\IIS_IUSRS, the user must be included in the security permissions for reading and writing (full control) on the “C: FactoryStudio ” directory, and you must ensure that all subdirectories (Projects, Settings, etc.) inherit these permissions. |
On
FromIE, use the
URL”http://localhost/tprojectserver/service.svc” url to verify if the service was correctly installed.
ThatThis should show a page with information about the service.
TWebClient/TSmartClient:
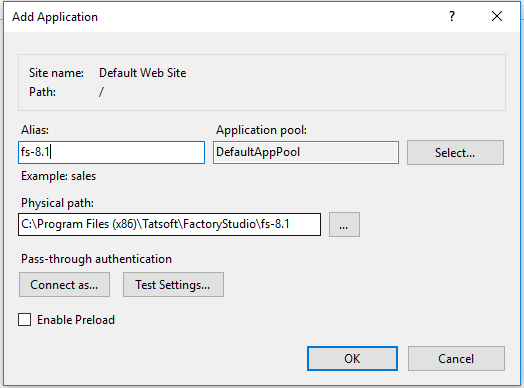
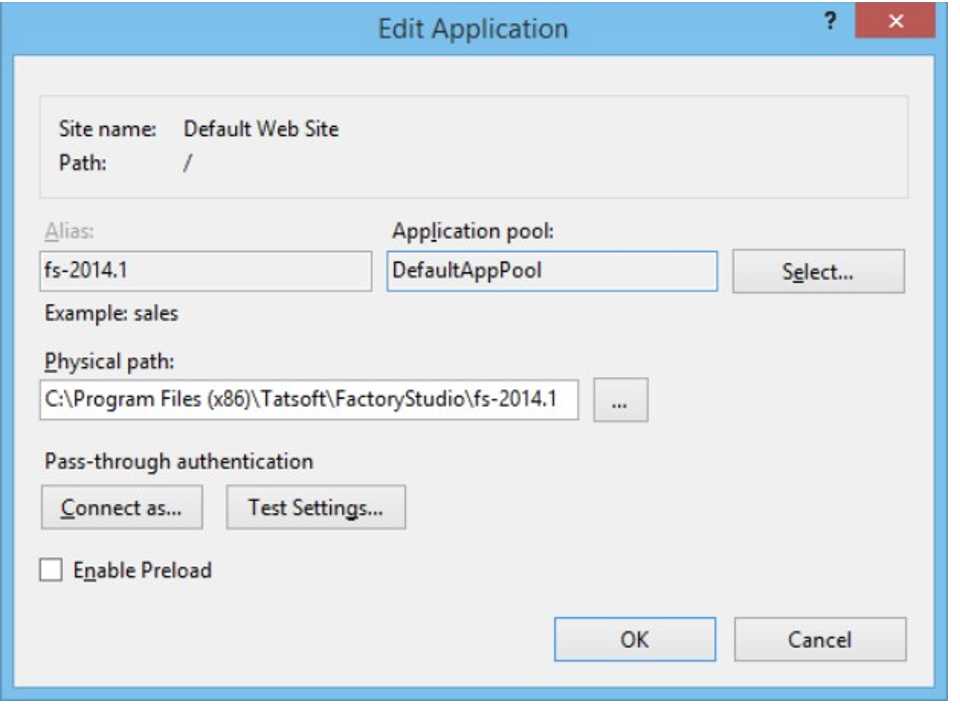
7. For TVisualizerWeb/TVisualizerRemote, configure:
| Note |
|---|
You should allow “Everyone” access to at least read. |
On IE, test
thethe “http://localhost/fs-
8 URL” url to verify the service was correctly installed.
ItThis should show a page with information about the service.
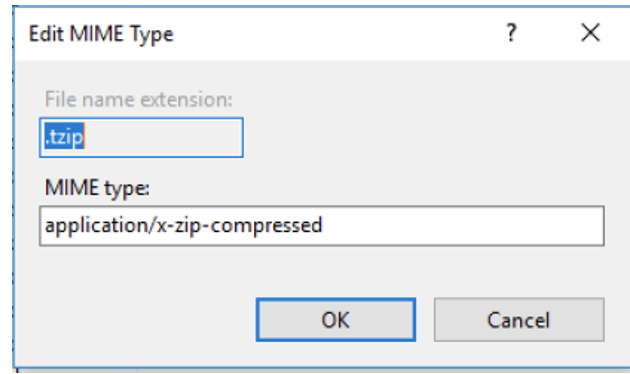
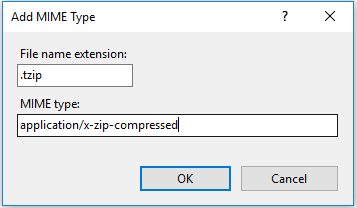
Go to MIME Types, and create the following MIME Type:
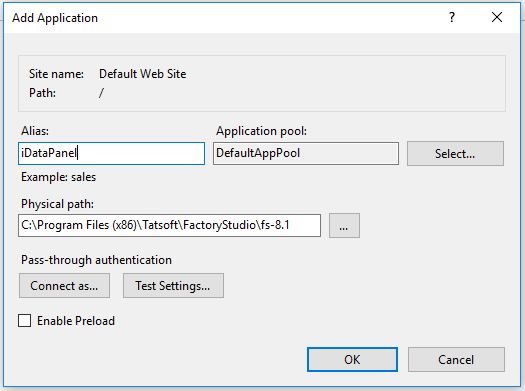
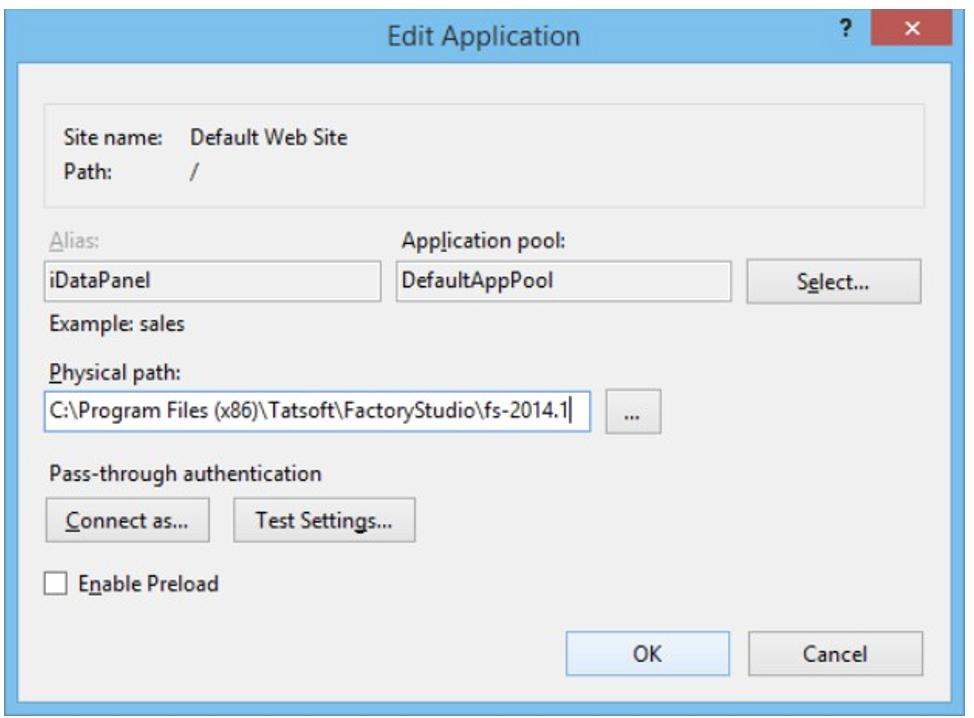
iDataPanel Service
8. For the iDataPanel Service, configure:
| Note |
|---|
You should allow “Everyone” access to at least read. |
iDataPanelImages 9. Forthe DataPanelImages (Virtual Directory), configure:
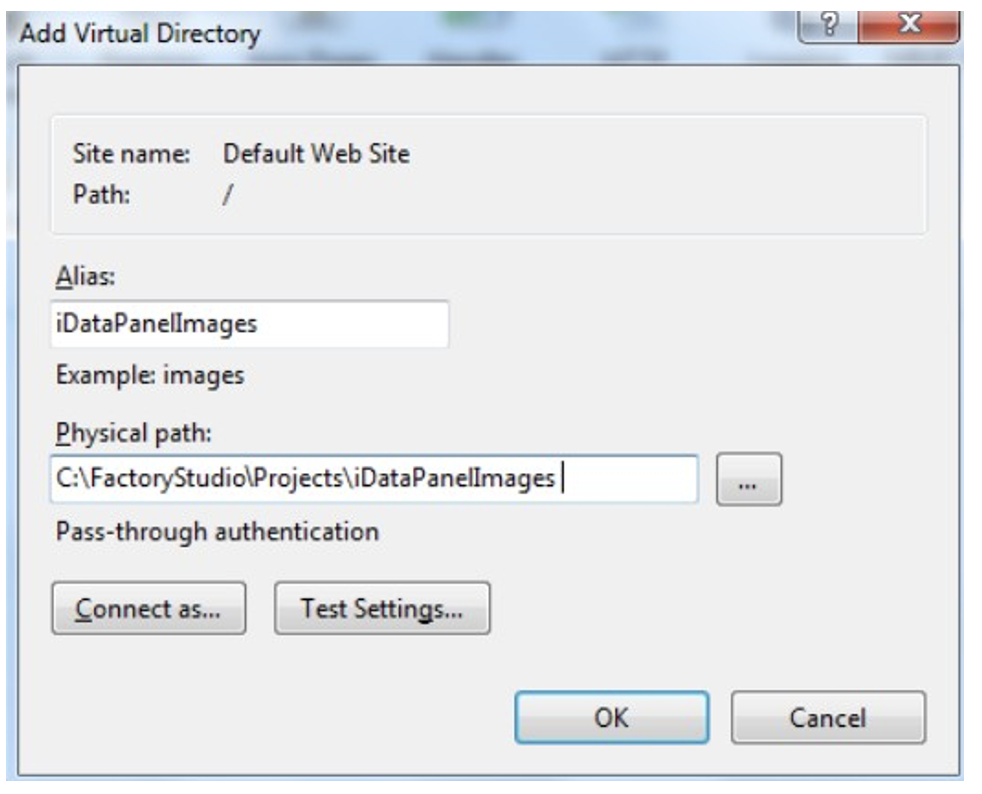
| Note |
|---|
You should allow “Everyone” access to at least read. |
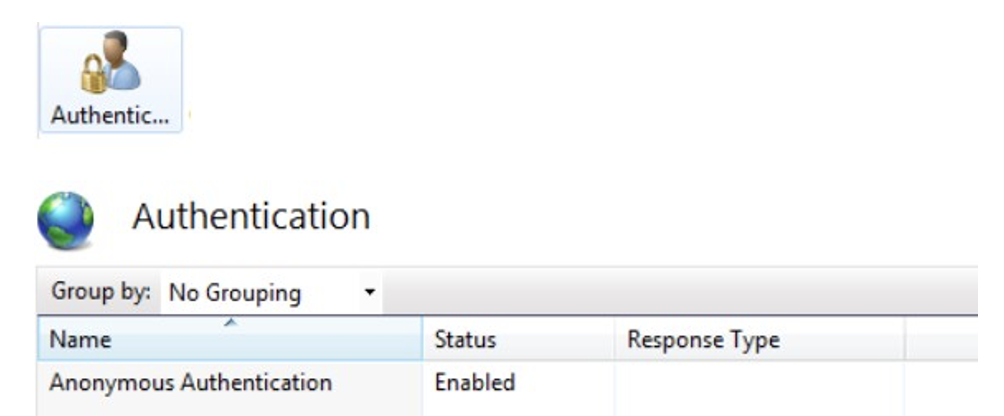
“Anonymous Authentication” must be enabled for 10. Enable Anonymous Authentication for each of the services.

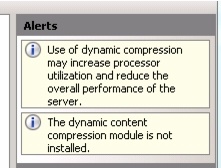
Go to 11. Setup the Compression module.

There’s check boxes. If it is not installed, you will may see the alert boxes.
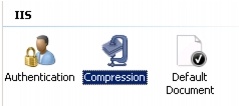
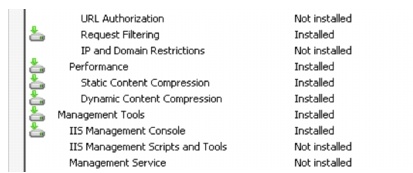
12. Create a new MIME Type for the .tzip extension
this yellow alert on the right side.
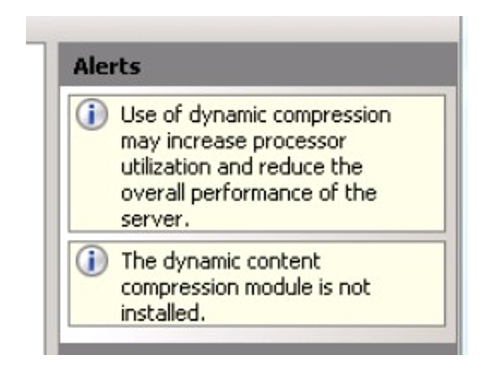
If it’s If the dynamic compression is not installed, go to the Server Manager, Roles, Web Server. Under Role Services, check your installed Roles. If Dynamic Compression isn't isn’t installed, click Add Roles and install it.
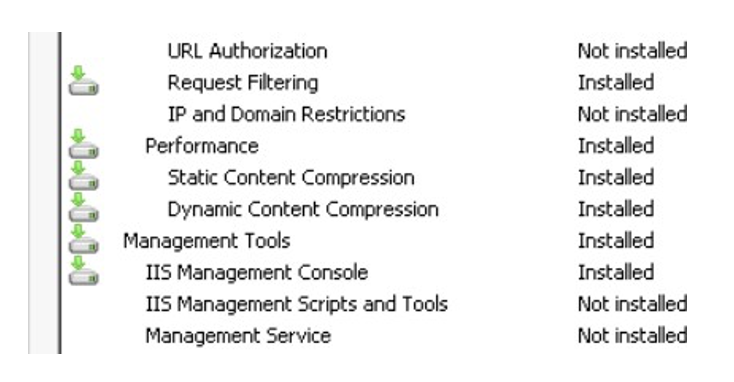
You can go back to compression the Compression module for your site and ensure Dynamic Compression is checked. At this point, Dynamic Compression should be setupset up, but you really need to must be specific about what mimeTypes MimeTypes will be compressed.
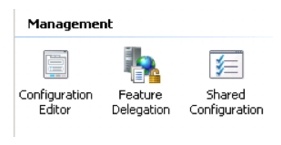
Back in IIS Manager, go to the page for the SERVER, not the SITE. Click on, "Configuration Editor".
From the dropdown, select system.webServer/
webdev /httpCompression
:.
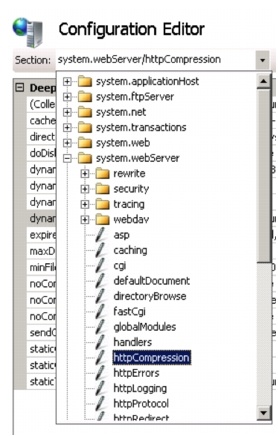
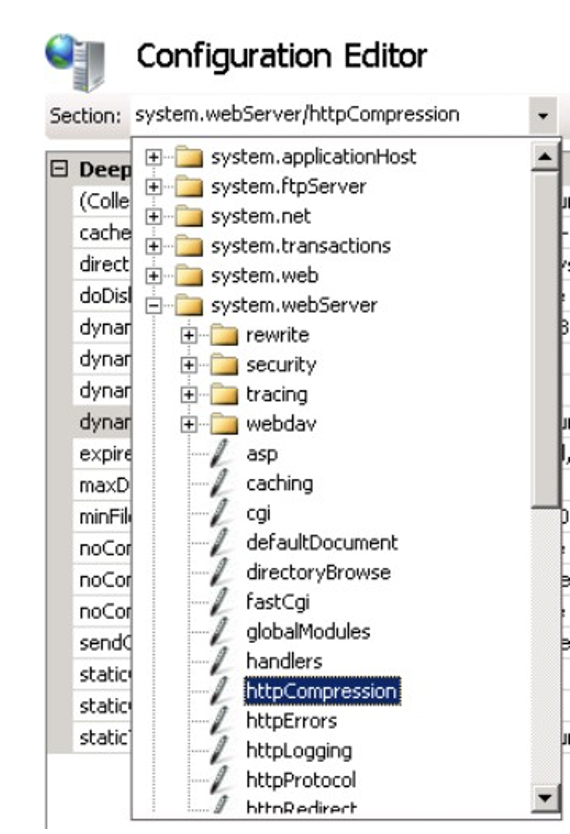
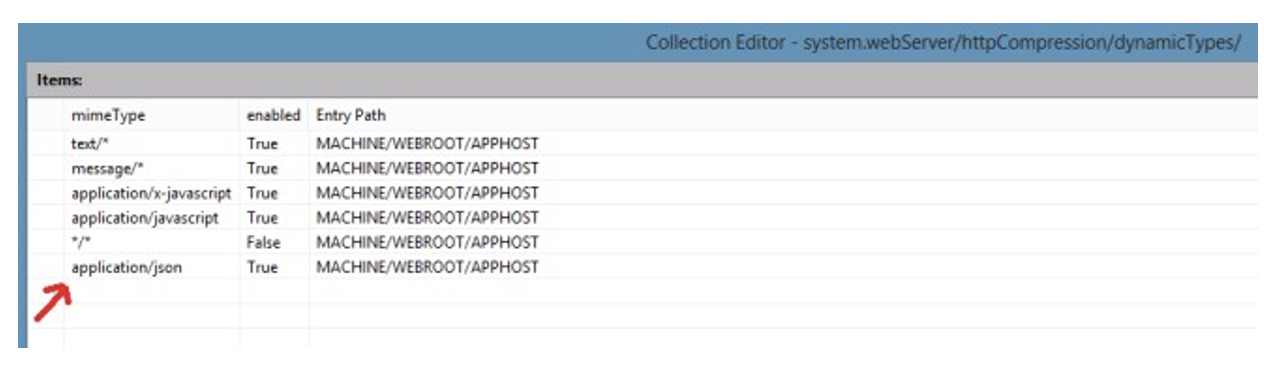
Then, click on Dynamic Types. Now that
you areyou’re in the list editor, add application/json
as shown below. Close the dialog after you add it.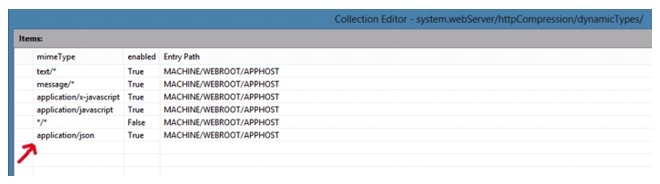
.
| Note |
|---|
IIS must be restarted after configuring the services. |
After you have completed all of the above steps, the IIS configuration for HTTP access is completed.
If you want to configure a HTTPS connection as well, follow the next steps.
The steps for configuring Secure Sockets Layer (SSL) for a site are the same in IIS 7, IIS 6.0, and the above. The steps include the following:
Get an appropriate certificate. Create an HTTPS binding on a site. Test by making a request to the site. Optionally configure SSL options by making SSL a requirement.
For the server certificate, you have two options.
The first is to acquire a paid certificate that will ensure your web security. The second one is to generate a self-signed certificate that will only be used for testing purposes. We do not recommend using a self-signed certificate in final project deployment.
If you choose to use the self-signed certificate, follow the next steps.
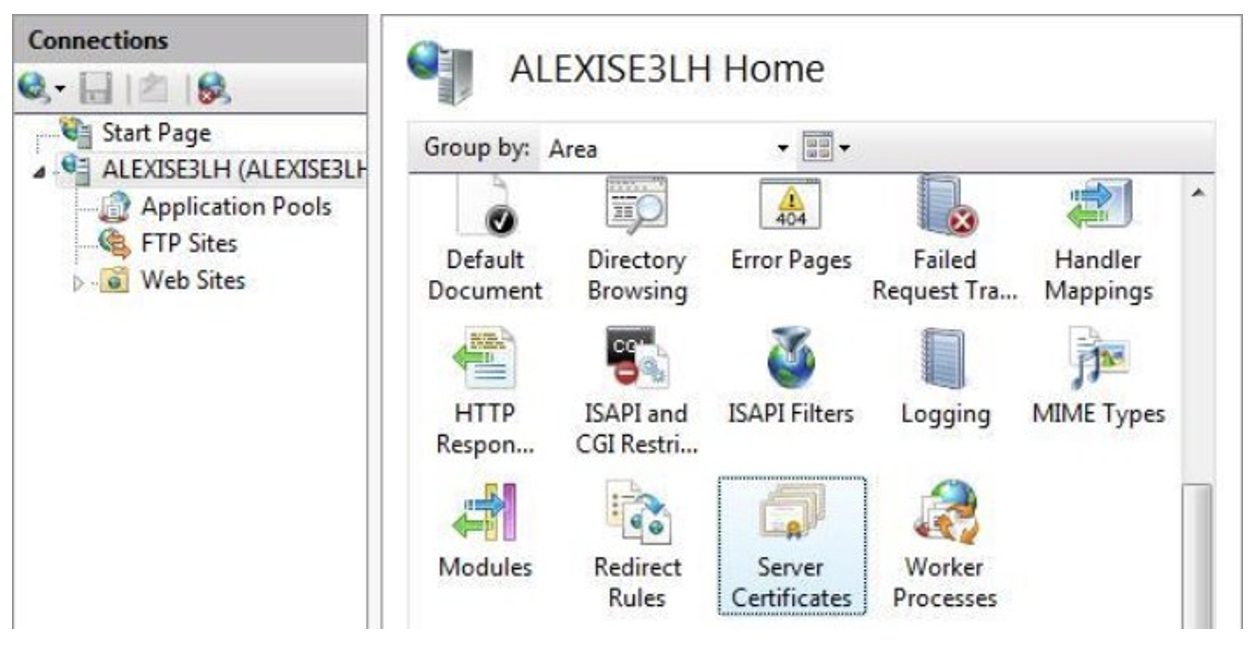
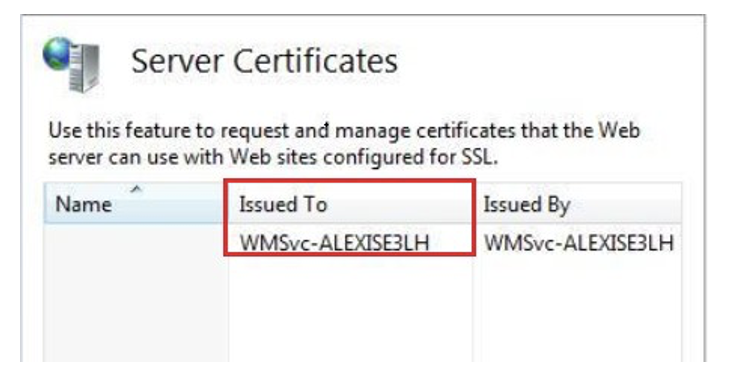
Select the server node in the tree view, and double-click the Server Certificates feature in the list view:
Click Create Self-Signed Certificate... in the Actions pane.
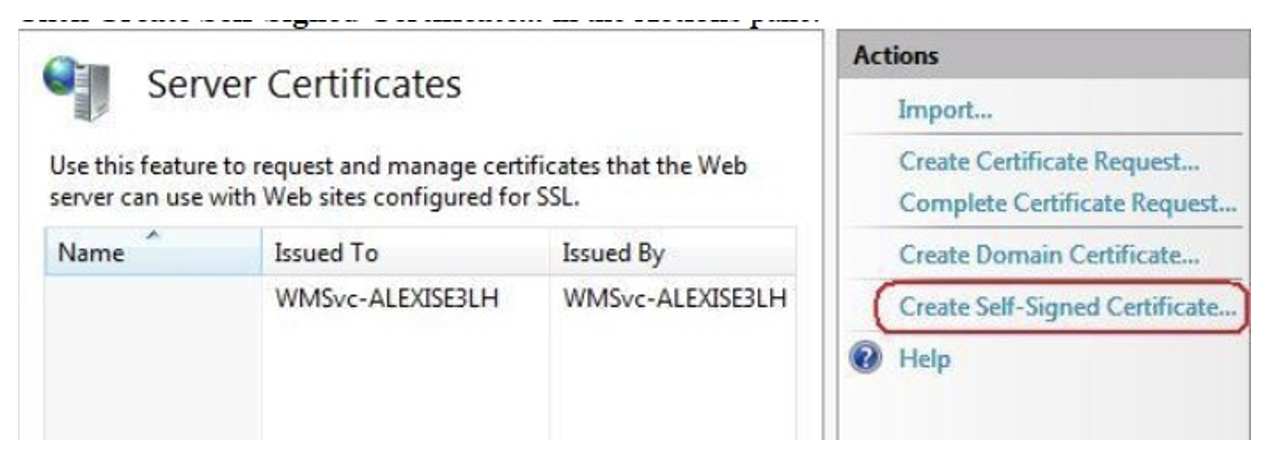
Enter a friendly name for the new certificate, and click OK.
Now, you have a self-signed certificate. The certificate is marked for ”Server Authentication” use, which means it uses a server-side certificate for HTTP SSL encryption and for authenticating the identity of the server.
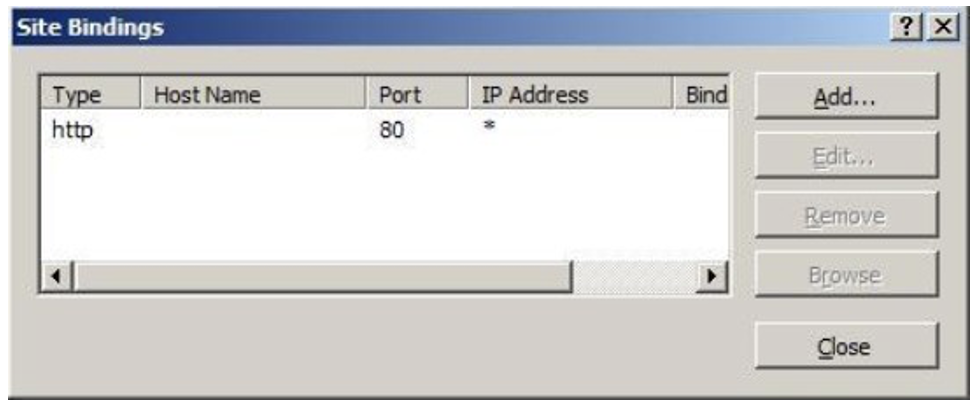
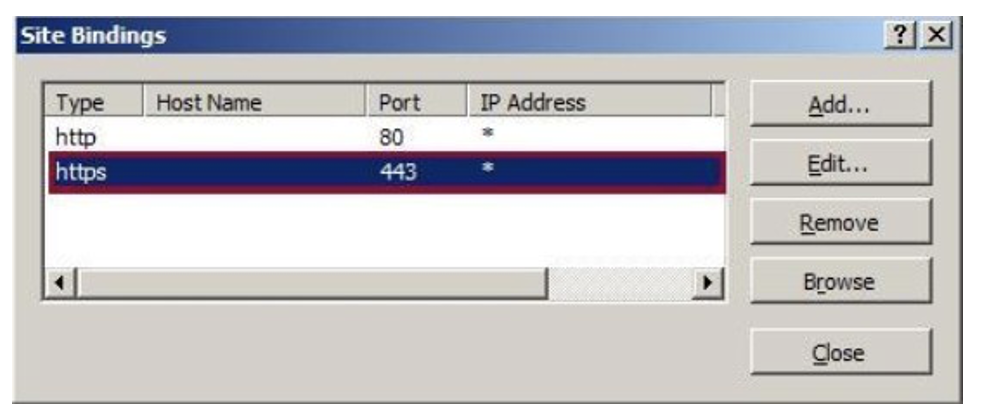
Select a site in the tree view and click Bindings... in the Actions pane. This brings up the Bindings Editor that lets you create, edit, and delete bindings for your Web site. Click Add... to add your new SSL binding to the site.
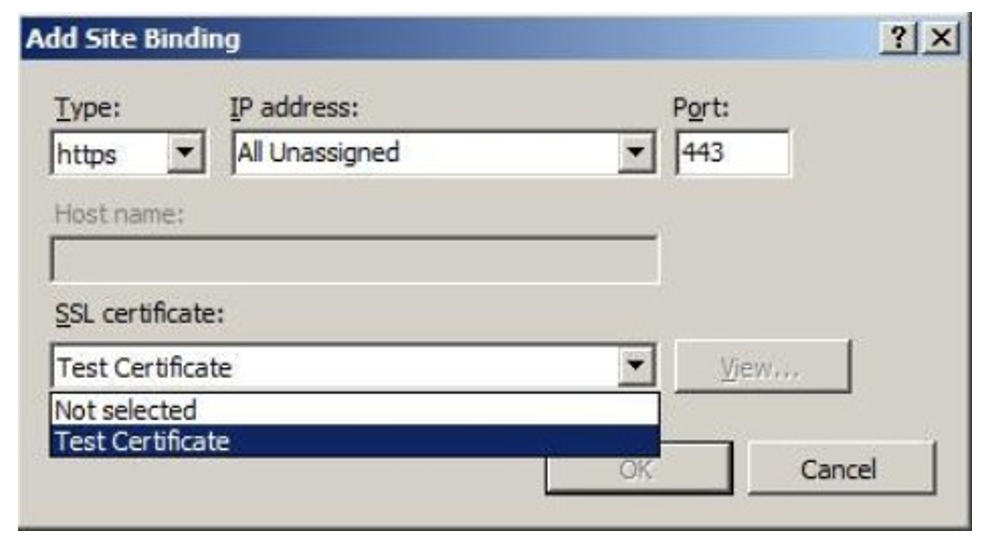
The default settings for a new binding are set to HTTP on Port 80. Select https in the Type dropdown list. Select the self-signed certificate you created in the previous section from the SSL Certificate drop-down list, and click OK.
Now, you have a new SSL binding on your site and all that remains is to verify that it works.
In the Actions pane, under Browse Web Site, click the link associated with the binding you just created.
| Note |
|---|
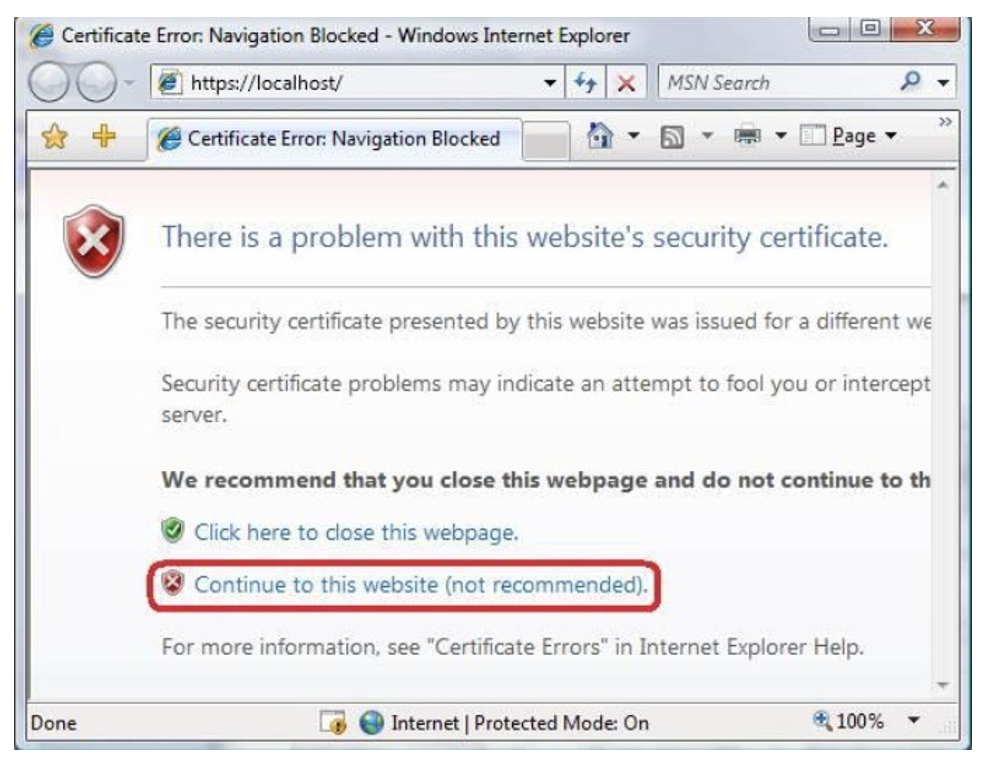
Internet Explorer 7 and above will display an error page because the self-signed certificate was issued by your computer, not by a trusted Certificate Authority (CA). Internet Explorer 7 and above will trust the certificate if you add it to the list of Trusted Root Certification Authorities in the certificates store on the local computer or in Group Policy for the domain. |
Click Continue to this website (not recommended).
*IMPORTANT: The self-signed certificate should only be used for local development. Microsoft Internet Explorer does not trust self-signed certificates by default for security reasons.
However, for testing propose, you need to follow the steps below:
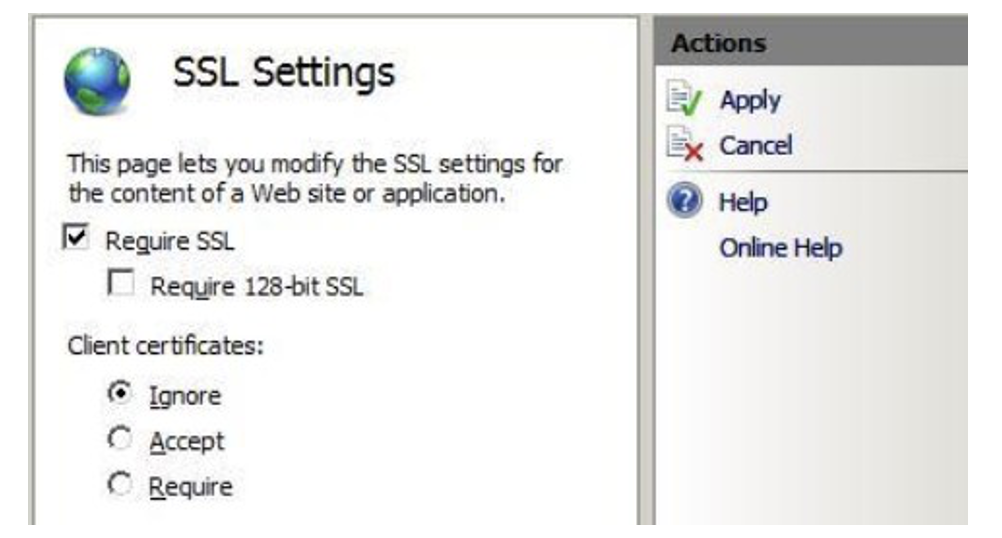
Configure SSL settings if you want your site to require SSL or to interact in a specific way with client certificates. Click the site node in the tree view to go back to the site’s home page. Double-click the SSL Settings feature in the middle pane.
C:\ProgramFiles (x86)\Tatsoft\FactoryStudio
C:\ProgramFiles (x86)\Tatsoft\FactoryStudio\fs-2014.1\
| Code Block | ||
|---|---|---|
| ||
<!-- If using HTTP then Security Mode is None by default -->
<security mode="None" />
<!-- If using HTTP then Security Mode can use Windows Authentication -->
<!--
<security mode="Transport">
<transport clientCredentialType="Windows"/>
</security>
-->
<!-- If using HTTPS then Security Mode is Transport -->
<!--
<security mode="Transport">
<transport clientCredentialType="None"/>
</security>
--> |
Replace with:
| Code Block |
|---|
<!-- If using HTTP then Security Mode is None by default
<security mode="None" />
-->
<!-- If using HTTP then Security Mode can use Windows Authentication -->
<!--
<security mode="Transport">
<transport clientCredentialType="Windows"/>
</security>
-->
<!-- If using HTTPS then Security Mode is Transport -->

<security mode="Transport">
<transport clientCredentialType="None"/>
</security> |
Repeat this procedure throughout the xml file.
| Note |
|---|
http://www.iis.net/learn/manage/configuring-security/how-to-set-up-ssl-on-iis |
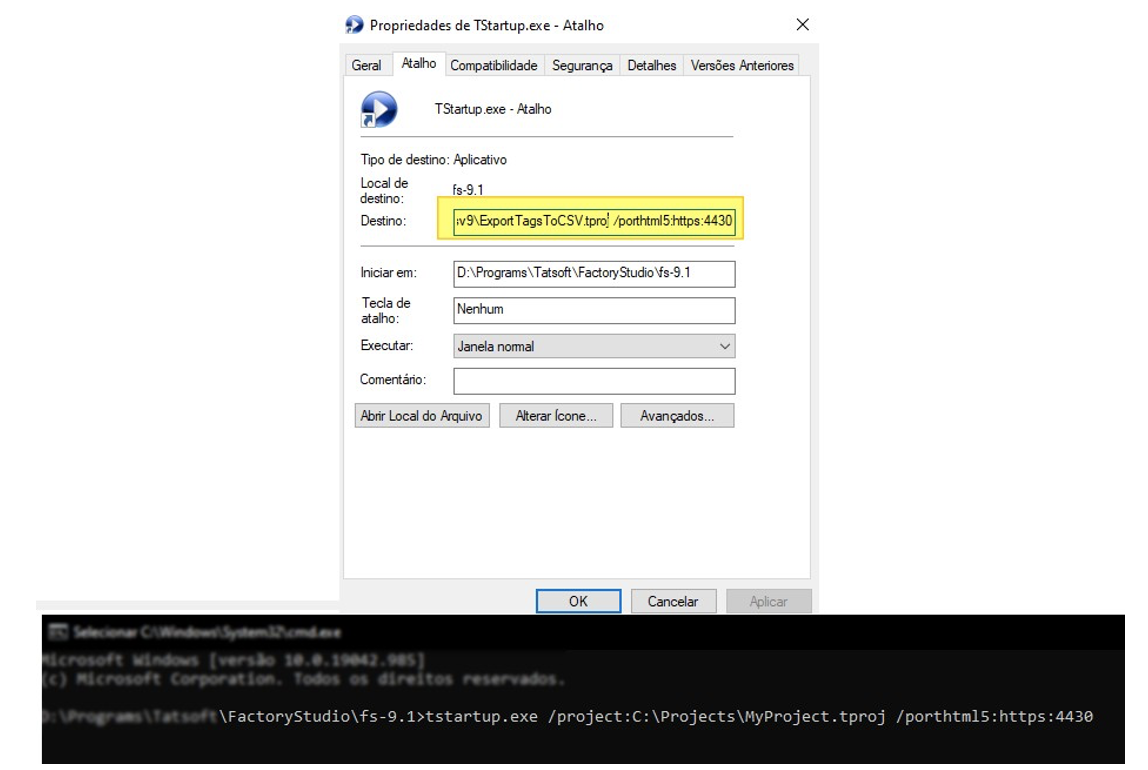
If using https to access a WebClient (HTML5), you must inform the application of the correct port number for this connection.
To do so, create a shortcut of the TStartup.exe application, or launch the command prompt from the installation folder (fs-xx.x). Add the project and html5port parameters as indicated in the image.
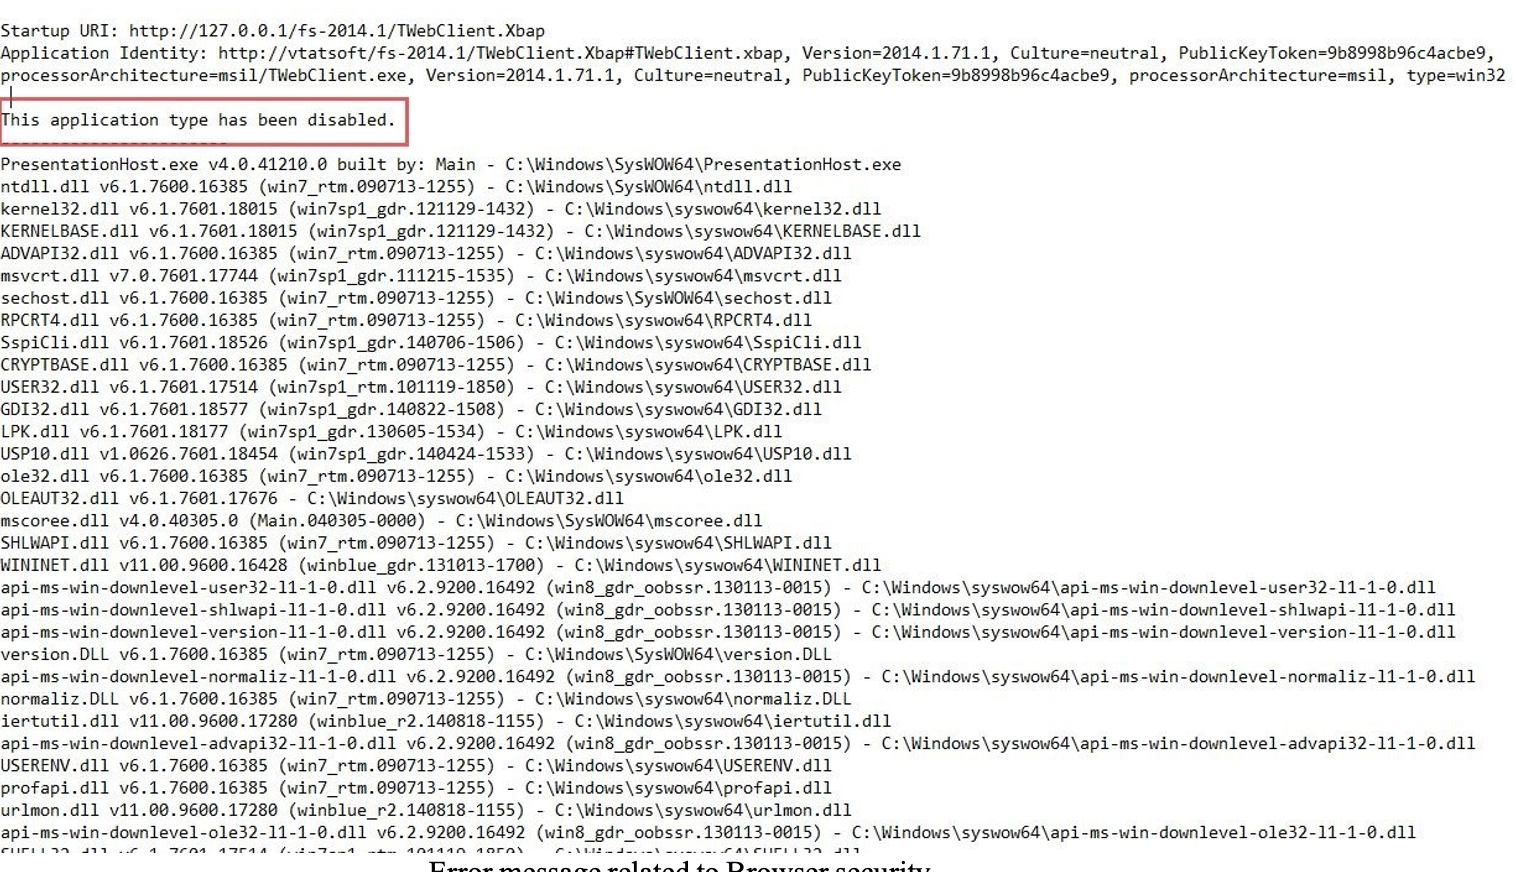
If you get an error message like the image above, it might be related to your Browser security settings. Microsoft's automatic updates of Internet Explorer may change some defaults on .NET support, which may cause your browser to have disabled XAML browser based applications.
In order to check for this issue, open the ”Internet Options” of Internet Explorer, and navigate as shown in the image below.
Make sure that on the .NET Framework section, the XAML browser based applications is set to Enable.

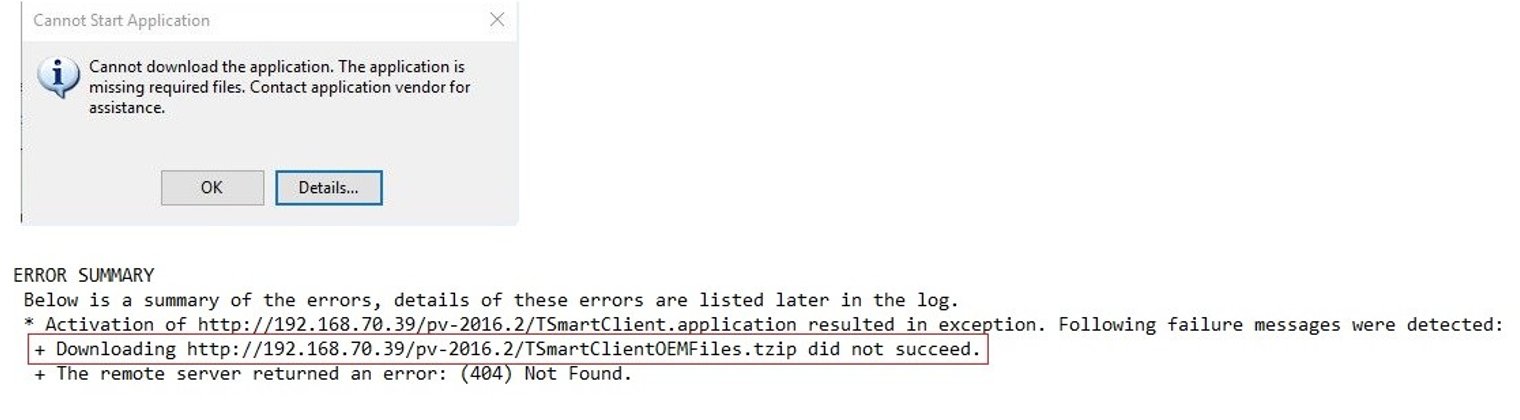
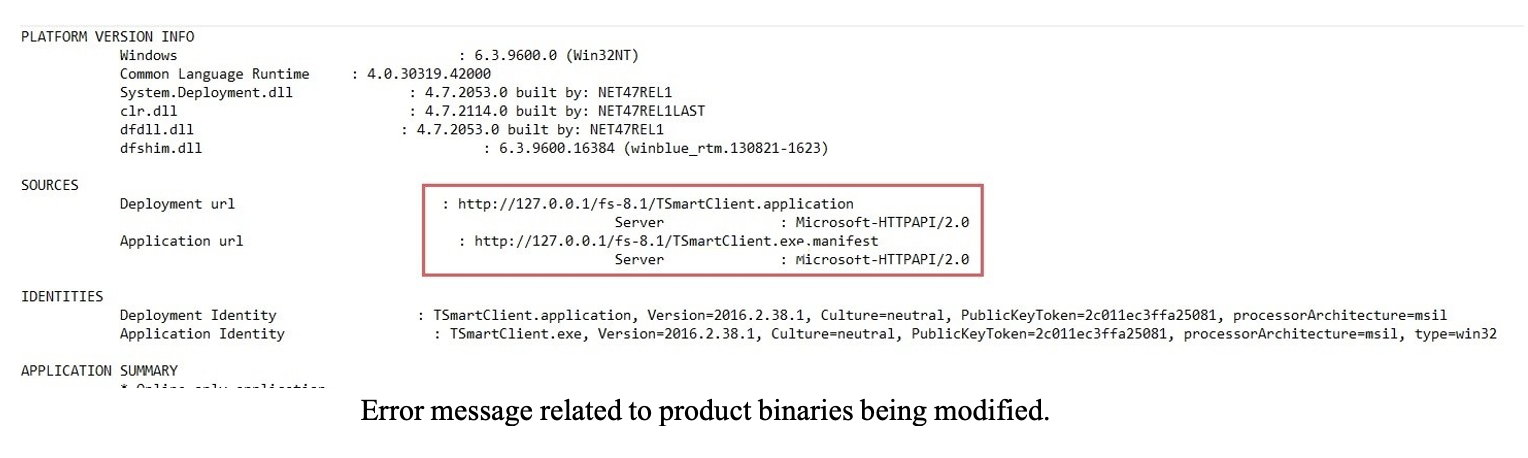
If the error message you get is something like the following image, the problem might be related to some files being missing from the installation folder. To check for this, go to your products installation folder and search for that file.
If you do not find it, you should uninstall the product, and install it again.
If the error message you get is something like the image, the problem might be related to some files being missing from the installation folder. To check for this, go to your products installation folder and search for that file.
If you do not find it, you should uninstall the product, and install it again.
It is quite common for a firewall to prevent remote access to the application. So, before accessing remotely, try to open a local copy of the browser locally on the server.
Run the server and the client on the same computer before trying to remotely access the application.
| Code Block |
|---|
http://localhost/fs-2014.2/TWebClient.Xbap or http://127.0.0.1/fs-2014.2/TWebClient.Xbap |
Or, run the server and the client with another Port number. For example, 1234.
| Code Block |
|---|
http://localhost/fs-2014.2:1234/TWebClient.Xbap or http://127.0.0.1:1234/fs-2014.2/TWebClient |
If you are unable to launch the client and the error message is different from the ones above, the user currently logged into the system might not have the necessary permissions to access the files through an HTTP or HTTPS connection.
To overcome this, launch the Command Prompt as an Administrator and execute the following commands:
| Code Block |
|---|
For port used in HTTP (in this example 80)

netsh http add urlacl url=http://+:80/thtml5/+ sddl=D:(A;;GX;;;IU) For port used in HTTPS (in this example 4430)
netsh http add urlacl url=https://+:4430/thtml5/+ sddl=D:(A;;GX;;;IU) |
| Warning |
| IIS must be restarted after configuring the services. |